We are starting a new chapter on the farm this fall. After 10 years on the farm Ellen, Aaron and their children, Della and Frannie have moved to Port Stanley, a near by village. Ellen has moved on from farming to becoming a therapist…what does that say about farming? However, I find getting my hands in the dirt and cooking to be therapeutic, so we will see what Ellen comes up with in the long run. Having 10 years with Ellen and her family next door when, the girls were little, was a blessing and we will continue to enjoy family time together.
Grayden and Jess and their children, Lillli and Louie are moving to the farm in November. Their current house is being expropriated to make room for a highway expansion northwest of St. Thomas. Since Ellen was no longer actively farming, she and Aaron decided to move off the farm and make room for Grayden and his family to move on farm rather than try and build another house here. We are in the process of retrofitting the greenhouse to become an art studio for Grayden and doing a bit of a face-lift or rather floor-lift in the main farmhouse. Yesterday, Jess and I sanded the kitchen and bathroom floors. The 35 years of hard use on pine floors was very evident!
On the farm front, Grayden is preparing to plant some Christmas Trees in the spring and ease into that aspect of farming. He has fond memories our small Christmas Tree business from his youth. We will continue to grow a range of vegetables for ourselves, but are planning on having all the gardens up near the houses next year. Ken will continue to custom graze beef cattle and keep his small herd of Suffolk Punch horses. I am enjoying my dye plant gardens and look forward to having more time to play with natural dyeing and eco printing.
Ken is taking a woodlot stewardship course and yesterday went to the woods with Louie to prepare for a presentation. We have one beautiful oak mother tree where Louie’s parents exchanged wedding vows five years ago. Ken took a picture of Louie under the tree…
Louie under the oak-wedding-mother-tree in the woodlot.
Good morning! Pre-orders through the online store will open next week on Tuesday, April 27th at 8am.
Order Tuesday/Wednesday, and then pick up your order at the farm Friday (in the old pick up room attached to the house) or at the Covent Market Saturday! Or just come by and say hi at the market Saturday May 1st at the outdoor farmer’s market 8am-1pm.
As always, the season starts slowly – you all know it was chilly this week, but we will see some asparagus in just a few weeks, sooner if the weather cooperates! And rhubarb a week or so after that. But we will have spinach, salad mix, radishes, green garlic and other treats of the season.
Frozen soups – 3 bean Chili, Spring Greens & Pork soup, Chunky Veg with Chickpeas & Ginger, Kohlrabi & Sausage with Tomato, Pastured Chicken Broth. Frozen whole hog sausage from our own pigs – sausage is generally made from all the leftover bits, but this is a sausage made from one whole hog – I think it holds shape better and has better flavor. Plain, garlic & breakfast sausage. Plants – at first we will have some of the hardiest seedlings (broccoli, cauliflower, kale, lettuce, calendula and parsley), because we are still liable to get a frost until the latter half of May, and some sensitive types (tomato, basil, pepper) can’t handle it. As the season progresses, we will have more variety of seedlings.
You’ll see Seth’s Bread, Darryl’s Maple Syrup and our own organically fed pastured eggs. We got a new batch of laying hens, so we will have small (they’re like practice eggs for the first few months) and large eggs.
And Suzy had her foal! It’s a filly named Kelly and she’s doing well – she spends all of her time on pasture with her mama at this point, glued to her mother’s side. It’s lovely to have new life on the farm.
Have a great week and thanks for all the support! Ellen
Greenhouse is starting to pop at the seams! Kelly with her mom, Suzy
Organic farmers have been criticized for using too much tillage. We use
tillage to terminate one crop and prepare the soil for planting the next crop
and then we use more tillage in row crops to control weeds during the growing
season.
To develop no-till planting strategies for organic farmers it requires a
lot of management skills and experience to figure out what cover crops or
combinations thereof to create a good planting situation and season long weed
control.
To do it with horse power requires another whole level of adaptation and
creativity to evolve the machinery necessary to do the job of planting into
heavy residues – getting the seed through the residue and into the soil and not
exposing too much bare soil which is an invitation for weeds to grow.
There are 2 basic strategies that I have used: planting into winter
killed cover crops like daikon radish or sorghum-sudan grass: or planting into
mowed or roller/crimped growing covers like oats/barley/peas or winter rye or buckwheat.
Interestingly the 2 pieces of equipment that I use for terminating growing covers are both built by I&J an Amish equipment company in Pennsylvania. The I &J mower[7ft.] I use has a double reciprocating design which enables it to cut through any standing crop without plugging and does a nice job of laying it down evenly. The other tool, the roller/crimper was also designed by I&J and I was fortunate to find one they had built with wheels to be trailed behind a forecart. The drum can be filled with water to make it more effective and the wheels can be lifted right off the ground to transfer even more weight to the roller. It is 8 feet wide and can be pulled by 2 horses or 3 if it is a bigger field.
No-till Drill
The more challenging piece of equipment is the no-till planter/drill.
Listening to the advice of a long time no-till conventional farmer [ who is
also my nephew] I avoided a system which is common on no-till drills which is a
row of coulters ahead of the openers. These coulters effectively loosen the
soil to allow the use of a lighter opener system. The problem is they absorb a
lot of horsepower. There is an Amish company that builds such a drill of
various sizes, ESCH in Pennsylvania. The design I went with involves a heavy
double disc opener on parallel-o-gram arms with one disc leading the other by
¾”. Then there is a press wheel at the rear to control the depth of seeding and
also functions to close the seed trench. These units were off a salvaged
tractor no-till drill built by Crust-Buster in the USA. There 8 units spaced 8”
apart. I usually pull this drill with 3 horses. It is raised and lowered with a
battery driven hydraulic system. I intentionally built the drill quite heavy
but I still added more weight because very heavy residue of firm soil can cause
an end wheel to lift off the ground. That is why the drive wheel for the
seeding mechanism is on a third wheel. The down pressure on the openers is
easily changed by moving a spring on the opener unit but of course is limited
by the total weight of the machine.
We have successfully no-tilled spring cereals into winter killed daikon radish, oats/barley/peas and sorghum-sudan grass, soybeans into roller/crimped winter rye and winter cereals into roller/crimped buckwheat and mown millet.
No-till Drilling Oat/Barley Mixture Into Different Winter Killed Cover Crops, April 6, 2019
It is a sure sign that fall is progressing when the flowers in the garden take on their rich fall colours. It is hard to believe that we only have three weeks left after this until the end of our main season CSA. The last Main Season Pick-up days are Tuesday, October 4th and Saturday, October 8th.
One Selection from our Organic Potato Trial
This season we took part in a trial for trying out new crosses for organic potato production. The potatoes were dug last week and we selected the varieties that performed the best, both in terms of yield and leaf hopper resistance. We have a number of selections to keep and grow out again next year to see how they perform. At the end of the month researchers are coming for a field day and we will cook some for a taste test. Ken is looking forward to continuing to work on this project in the years to come.
Bunkhouse with Plaster Damage
As we make room for the next generation on the farm, Ken and Martha are looking to move into what has been the bunkhouse. It is a timber frame with straw bale walls. Unfortunately, the lime sand plaster layer which covers the straw bales, particularly on the east wall, developed cracks. They were patched, but re-cracked and water got in and the lime sand outer layer separated from the clay under layer. Apparently, we should have added lime to the clay layers to help bind the lime sand layer. It would also have been better to have a larger overhang and perhaps not taken the straw bale wall so high on the east side. An added problem is that there is also some serious air leaks, making it challenging to heat in the winter months. As a result, we have decided to remove the straw bale walls and replace them with stud wall construction.
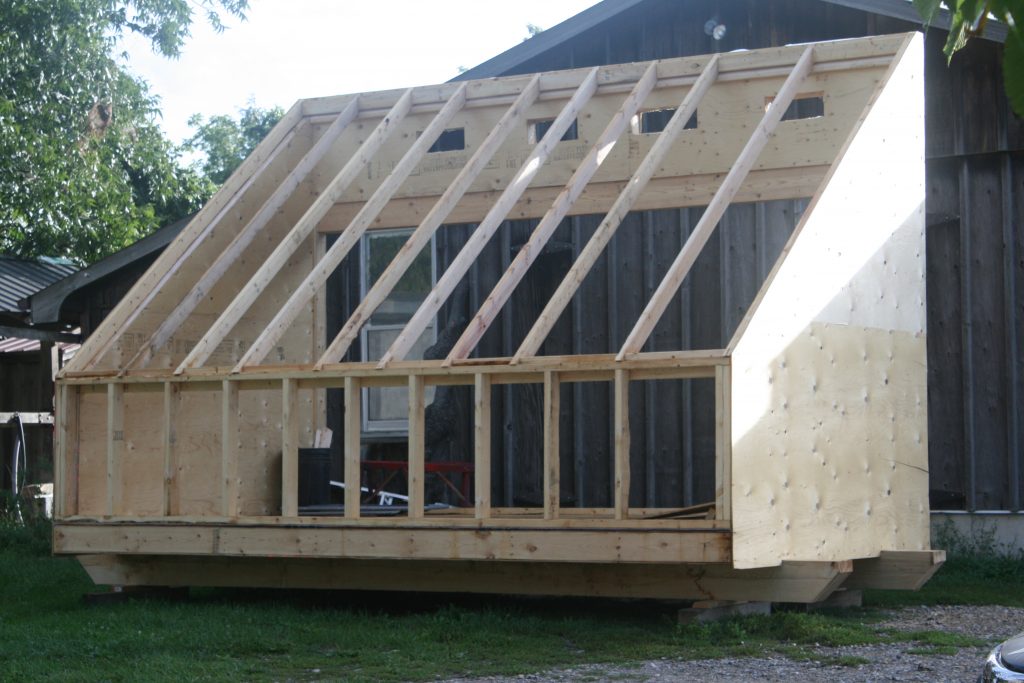
Solar Wood Drying Kiln under Construction
We need to dry some of our lumber to use in the renovations. Aaron and Heidi have been building a solar wood kiln to speed up the drying process.
Draft Horses Seeding No-Till Cover Crop
Ken is continuing with is no till drill and has planted a series of cover crops and is expecting to plant fall grain later this month both for the horses and for Seth to mill and make into his delicious bread.
Chuck harvesting the honey from the hives next to the garden.
The bounty is upon us – this week the share includes potatoes, melons and sweet corn. As well as some of the things that you’ve been getting for a week or two (beans, broccoli, summer squash). The eggplant, tomatoes and peppers are just starting. This might be my favourite cooking season – although when there are so many delicious vegetables and fruits abound, not very many things require cooking!
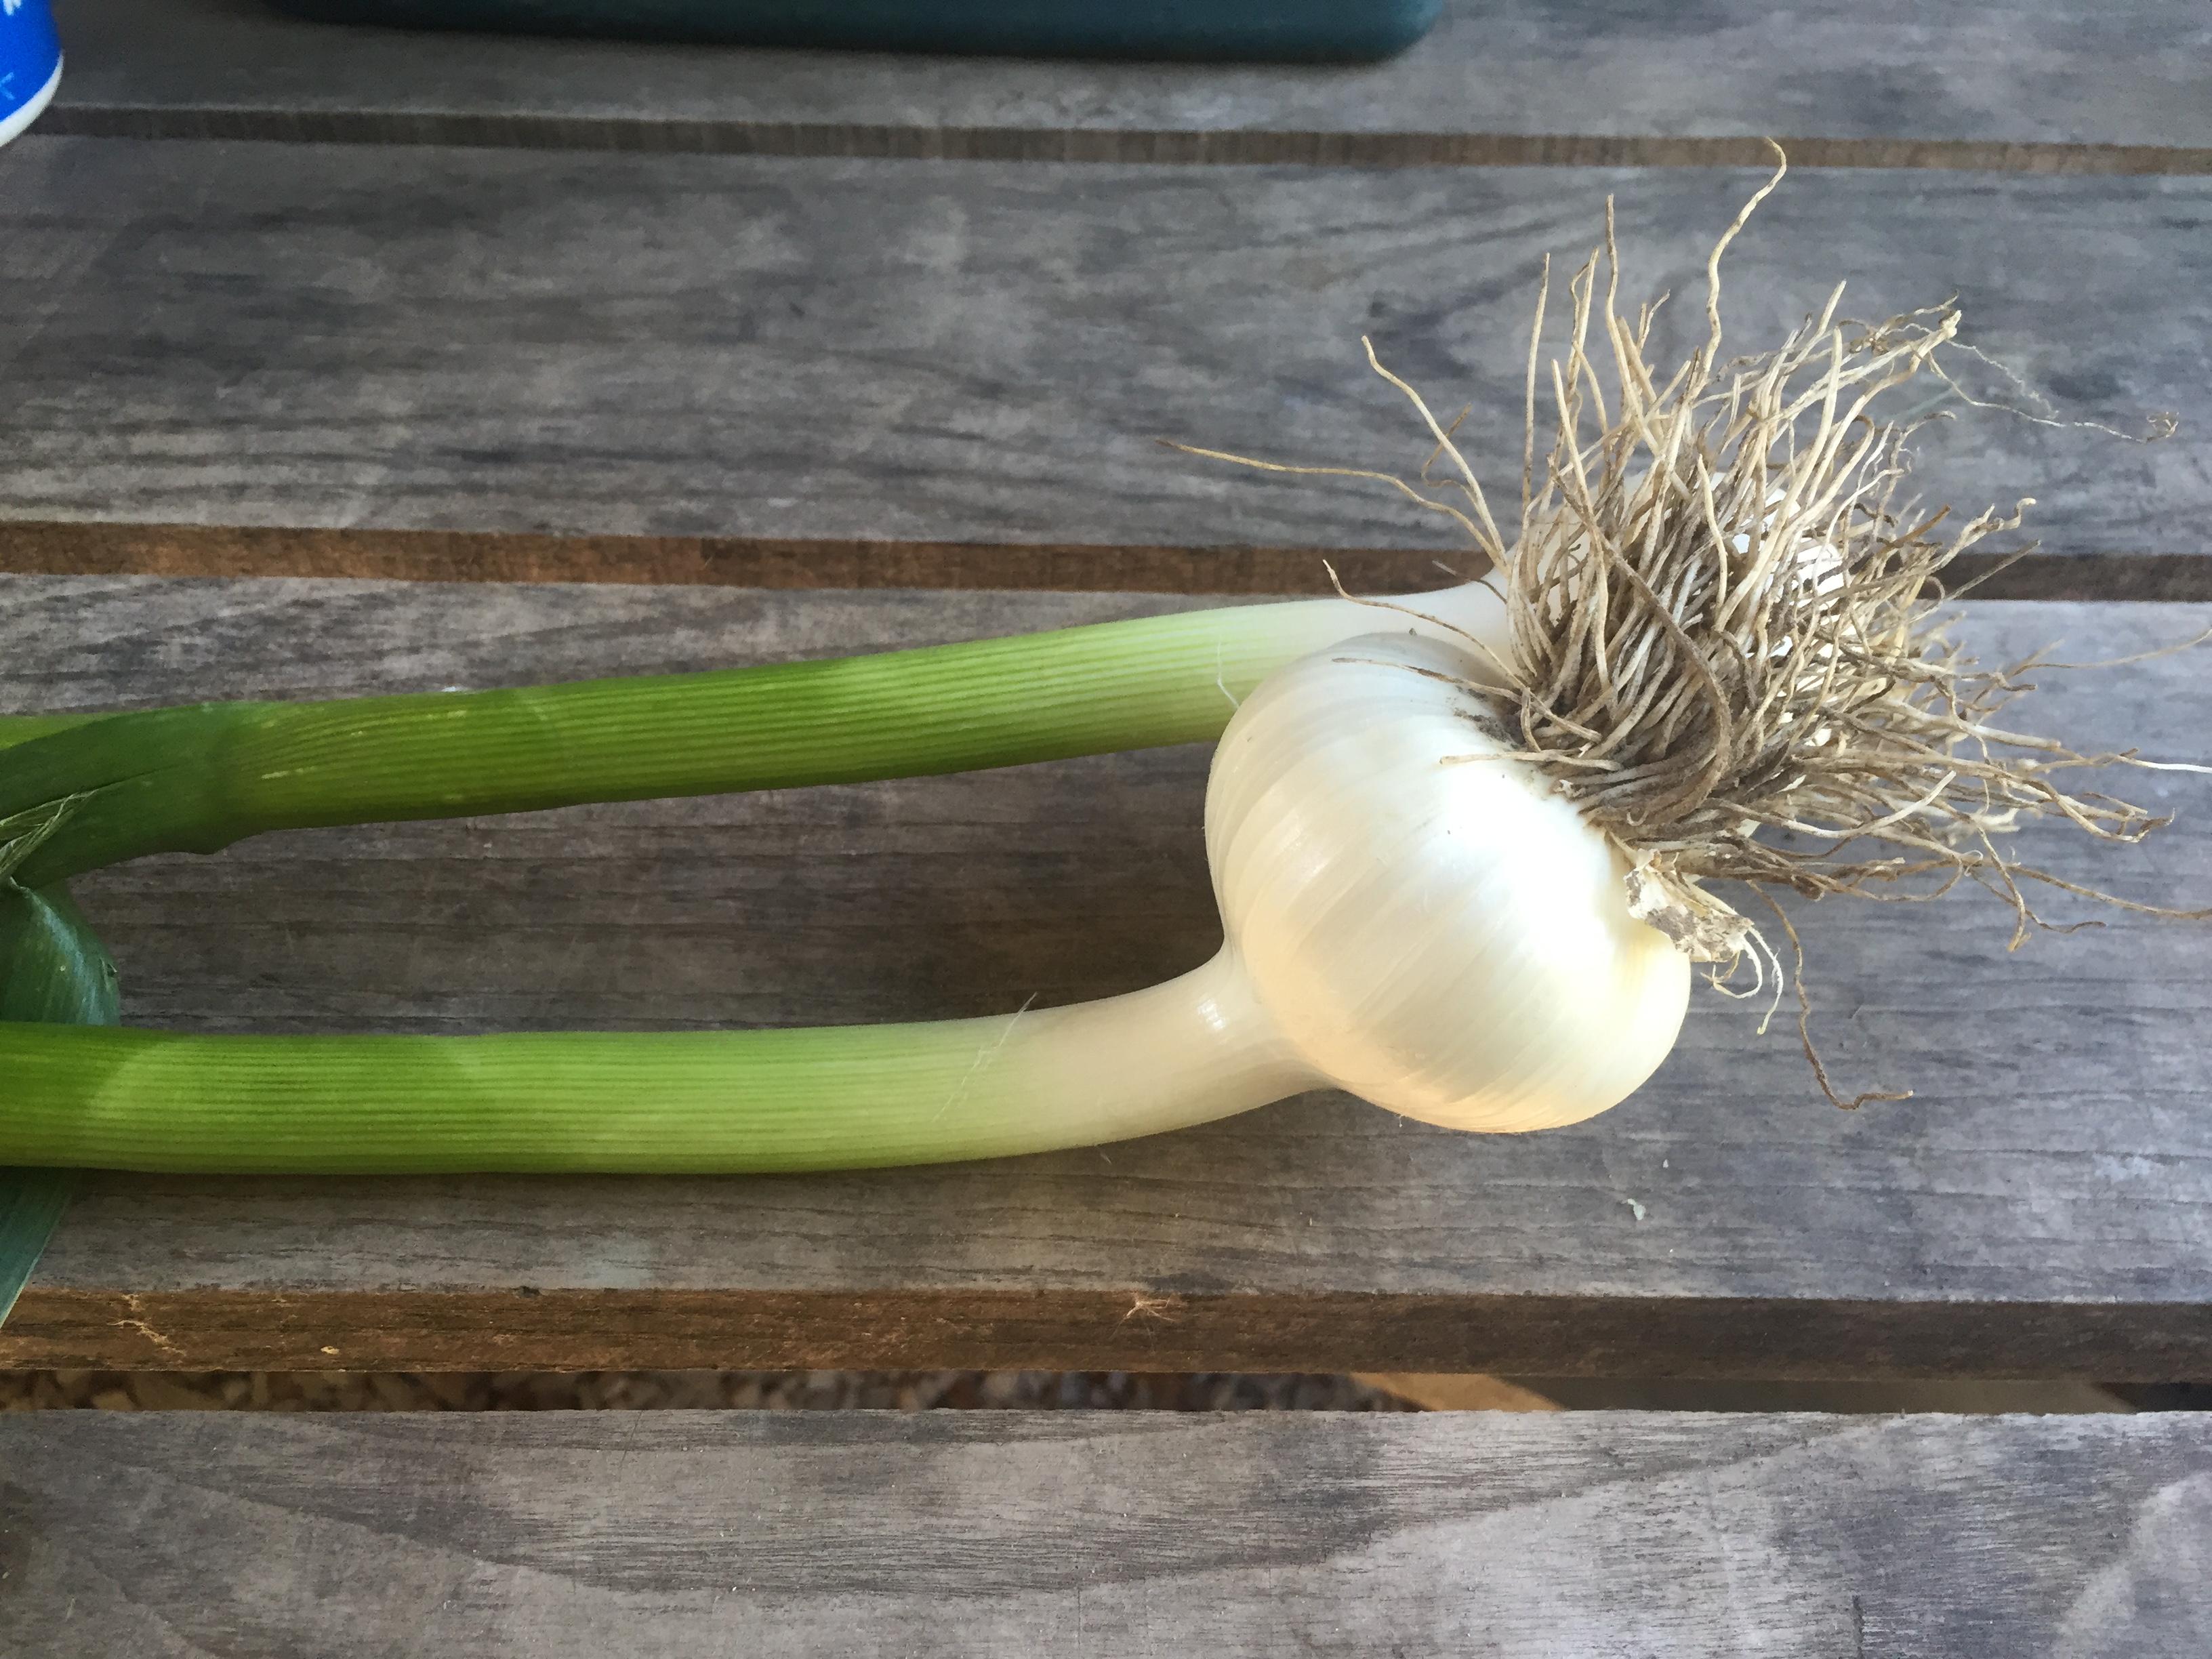
The garlic harvest
This week we harvested all the garlic that we planted last fall. It looks beautiful! It has turned into the ‘Orchard Hill Blend’ of garlic varieties – a few that we got from other farmers years ago, one smuggled from Italy by a garden member (not condoned!). Each year we save the very best heads of garlic to divide into cloves and plant in the fall. In this way, we have tailored the garlic that grows best in our particular micro region, and have produced some really lovely heads of garlic. We gather it in bundles and hang it in the eaves of the barn to dry and cure before cleaning it. When it is thoroughly dry, we can braid it or cut it off and store it for the winter. The garlic that you got in your share last week was fresh, meaning it wasn’t cured, and won’t store for months like the cured ones.
We have what might be the most beautiful watermelon harvest ever (per Martha) – they loved that hot dry weather that we had earlier in the season! You’ll notice that the watermelons that we grow are smaller than the ones you’ll typically find in the big grocery stores, but that’s purposeful because then they are the perfect size for a couple of people, rather than having a huge melon that sits in your fridge. You’ll also find that the melons are all different colours inside – yellow, pink, and orange. In the next few weeks you’ll receive a few different types of melons.
Here’s the ‘before’ picture of the mid season brassicas – possibly the worst, weediest EVER.
Florence the orphan calf is doing well – but she’s a fence breaker! She won’t stay in the electric fence. We tried putting her in with the chickens, but she tried to escape from there too. So she’s stuck in the green round pen. Each night Bryan takes her for a walk on a rope. Last night he took her down to the other end of the farm to try and make friends with the runaway beef cow (nicknamed Houdini). Some of you may remember that Houdini escaped from the pasture at the other end of the farm on the day of the very first pick up – we thought that she would get eaten by coyotes and we searched and searched for her – but she’s still alive! She’s just a wild cow that we can’t catch – she’s bigger now, too big to tackle. She hangs out in the swamp and we see her every once and a while, and try to corral her into the pasture, but then she just jumps through the fence again! The theme of the summer is weeds and runaway cattle.
Here are a few notes and recipes for some of the vegetables that you’ve been getting!
Eggplant
What a versatile vegetable! It goes Asian, Italian, or French, it melds beautifully with almost any flavor that you can throw at it. A lot of recipes call for salting slices of eggplant (slicing it, sprinkling it with salt, letting it sit and drying it off) – this serves two purposes – 1. Drawing out excess moisture so that it won’t have as much water and 2. Helping to mitigate the ‘bitter’ flavor. In my experience, if your eggplant is fresh, not over-mature, and cooked properly, bitterness isn’t a problem. And if they’re eggplant from your share – you don’t have to worry about it. It’s also easy to cook because you can’t overcook it! It tastes most delicious (in my opinion) when it’s charred on the outside.
Simple Roasted Eggplant
1 eggplant
2 Tablespoon olive oil
½ tsp salt
White pepper (or black), ground
Preheat the oven to 400˚
Pierce the outside of a whole eggplant with a fork.
Throw it in the oven on a baking sheet and bake for 45 minutes or an hour, until the skin is blistered and it looks shriveled and completely soft.
Take it out of the oven and let it cool 10 min. Cut it in half and scoop the soft innards out of the skin into a bowl. Add the olive oil, salt and a little pepper and mix well.
Serve on toast, toss with pasta (add some garlic and chopped tomatoes), or throw it in a burrito.
Baba ganoush variation – add a clove of crushed garlic, 1-2 Tablespoons tahini and 1-2 Tablespoons lemon juice.
Blackened Eggplant
Simple Grilled (Blackened) Eggplant
1 eggplant
2 Tablespoons olive oil
½ tsp salt
Black pepper, ground
Slice the eggplant in inch thick slices, lay out on a baking sheet and brush with olive oil on one side. Sprinkle that same side with salt and pepper.
Preheat the grill on high heat for 10 minutes.
Throw the eggplant on, oiled side down, and don’t move it or fuss with it. Cook for 10 minutes on high with the lid closed. Don’t turn it over, cook it just on one side. When it’s done, you should be able to see the top side bubbling a little bit and the bottom will be almost black. Use tongs or a metal spatula to take the eggplant off the grill. Don’t worry! It’s not burned, it’s ‘blackened’! And it’s the most delicious thing ever – the eggplant is earthy and smoky, suddenly more than just a vegetable.
Blitz it in the food processor to use for the baba ganoush (above), use in an eggplant parmesan recipe, or eat it as is!
Soba Noodles with Eggplant and Mango
This recipe is from the cookbook ‘Plenty’ – it’s an incredible vegetable cookery book with tons of interesting combinations of flavours, leaning in the middle-eastern direction. There are a lot of eggplant recipes. This one sounds crazy, but it’s actually really, really good.
In a small saucepan gently warm the vinegar, sugar and salt for up to 1 minute just until the sugar dissolves. Remove from the heat and add the garlic, chile pepper and sesame oil. Allow to cool, then add the lime zest and juice.
Cook the soba noodles in plenty of salted water, stirring occasionally. They should take 5-8 min to become tender but still al dente. Drain and rinse well under running cold water. Shake off as much of the excess water as possible, then leave to dry on a dish towel.
In a mixing bowl toss the noodles with the dressing, mango, eggplant, half of the herbs and the onion. You can now leave this aside for 1-2 hours. When ready to serve add the rest of the herbs and mix well, then pile on a plate or in a bowl.
Parsley
We have more than a row (320 ft!) of Italian flat leaf parsley this year, because I love it! I.must.always.have.parsley. It’s one of my staples – in the winter it substitutes for salad greens when all the things in the grocery store are flaccid things from California, and in summer it gets chopped up in almost every grain, bean or vegetable salad. But it seems to be languishing in the pickup room. I think flat parsley is far superior to curly parsley because it doesn’t tickle my mouth. I could come up with a few more reasons – it doesn’t hold the dirt so stubbornly, it looks more elegant when finely chopped, and I think the flavor is less bitter and more fragrant than curly parsley. All that being said, they are pretty much interchangeable in recipes.
It’s also a nutritional powerhouse! It’s packed full of all kinds of things I’ve barley heard of (volatile compounds) as well as Vitamin K, C, and A.
Parsley is best fresh or barely cooked, and will store well for a week or more, if stored loose in a plastic bag in the refrigerator.
Parsley Pesto
1 C flat leaf parsley leaves (from one big bunch)
2 cloves garlic
1 cup olive oil
large pinch salt
6-8 turns of white pepper (or black)
Remove the leaves from the stem of the parsley – you don’t have to be too picky because it’s going to be blended up, but too many stems won’t make a nice pesto. Combine all the ingredients in a blender or food processor. Puree until it’s a texture that you like. Taste and adjust as necessary. Store in a covered container in the fridge for up to a week. Shake or stir well before using.
Brush on bread before toasting for a crostini (aka bruschetta), add to any soup just before serving, use in a pasta sauce at the last minute. Also great tossed with any grilled vegetable hot off the grill (i.e. peppers, zucchini, eggplant, carrots).
Green Gazpacho
Another one from ‘Plenty’ – it’s a chilled soup, super fast and easy to make, fantastic on a hot day, and a great way to use up some of those cucumbers. It’s great served with croutons and a drizzle of olive oil. Serves 6
2 stalks celery (leaves too)
2 small green peppers, seeded
1 ¼ lbs cucumber (6 small or 2-3 large)
3 slices stale white bread, no crusts
1 fresh green chile (like jalapeno)
4 garlic cloves
1 tsp sugar
1 ½ C walnuts, lightly toasted
6 C baby spinach (or 4 C swiss chard)
1 C basil leaves
2 Tbsp chopped parsley
4 Tbsp sherry vinegar (red wine vin in a pinch)
1 C olive oil
3 Tbsp greek yogurt
about 2 C water
1 C ice cubes
2 tsp salt
white pepper
Roughly chop the celery, bell peppers, cucumbers, bread, chile and garlic. Place in a blender and add the sugar, walnuts, spinach, basil, parsley, vinegar, oil, yogurt, most of the water, half the ice cubes, the salt and some white pepper. Blend the soup until smooth. Add more water if needed to get your preferred consistency. Taste the soup and adjust the seasoning. Lastly, add the remaining ice and pulse once or twice, just to crush it a little. Serve at once.
An introductory, housekeeping item – it’s Ellen behind the keyboard here. I have taken over managing the blog, facebook page and instagram account. Martha will occasionally post something, but we thought that you might like to know who you’re reading.
One of things I love about farming and living a life that is so seasonal is that patterns start to emerge between events, plants and animals, sometimes seemingly otherwise unrelated. The other day I mentioned that Home County Music Festival was coming up to my mom and she said ‘oh, that means we need to put the electric fence up around the sweet corn’ (to keep the raccoons out), because she remembers the past few years, rushing around to get that done before going to the music festival.
2016 is shaping up to be the year of the weeds! Some combination of no-till cover crops, lack of rain, and who knows what has created the highest weed pressure of any year that my parents can remember. Upside – you get to feel like a superhero, swooping in to save the poor plants from certain doom in the pigweed jungle. Every 2 weeks. Downside – it feels like there’s no time to do anything but weed. It has such an effect that we have decided to change the location of the 2017 garden – there were so many weeds coming up in the field destined for vegetables that we have switched it up and it will now be planted to buckwheat (and a few more cover crops).
The garlic should be ready to harvest in the next week or two and it looks glorious! The heads are big and beautiful. The cucumbers are getting off to a slow start because Martha went to a seminar this winter and came away with recommendations for cucumber varieties, and also the idea that cucumbers shouldn’t be transplanted because it sets them back too much – best to just get them in the soil sooner (in a hoop house). Sounds great! However, only 5-10% of the expensive, special cucumber seed germinated. So we replanted and those plants are coming along and we will have lots of cucumbers in a month or so….and in other good news, tomatoes, peppers and melons love all this hot dry weather, so they should be bountiful.
Florence the calf is doing well. She guzzles her milk each day, three times a day. Bryan takes her for a walk most evenings and she loves to suck on fingers (or hands, or baby feet!). We have brought in almost all the first cut hay now – it’s been great haying weather!
The multigenerational family farm operation is going well so far – it’s a challenge to get as much done as you think you will with small children in the mix (or it looms large from my perspective perhaps). But it’s very special to me to see the relationship develop between my parents and my children – and their relationship with my grandmother! She’s come a few times to help keep an eye on the children while we keep on top of stocking the pick up room. But it’s also interesting and heart tugging to see Della develop a relationship with the plants and animals that I spent so much time with when I was a child – making flower crowns with spring beauties, following toads, making forts for worms. Or picking blueberries for everyone for dinner! Ken and Martha are starting to plan for a renovation of the bunkhouse – adding a kitchen and bathroom, and probably replacing all the walls – that’s all! They shall start their (semi) retirement in style next year.
Here are a few recipes from garden members –
Spinach Pesto & Artichoke Pasta Salad
From Vicki Coughlin (at Telegraph House in Port Stanley) –
I didn’t have the artichokes (omitted them) and used this recipe hot as a side dish for dinner, and thought it was a brilliant way to use fresh organic spinach from Orchard Hill! (farmer note – it would also be delicious with swiss chard!)
250 g fusilli
1 garlic clove
2 cups packed spinach
1/4 cup toasted sliced almonds
1/4 cup parmesan
1 tablespoon lemon juice
1/4 tsp salt
1/3 cup olive oil
1/4 cup 2% plain yogurt
398 -ml can artichoke hearts, drained and chopped.
Cook pasta following package directions, but omitting salt, until tender. (Drain & rinse with cold water if making salad)
Whirl garlic clove with spinach, almonds, parmesan, lemon juice and salt in a food processor until finely chopped. Gradually whirl in oil until smooth.
Combine pesto with yogurt in a large bowl. Stir in pasta and artichokes if using.
Chia Fruit Jam
From Jackie Martens –
This is very quick and easy to make and I have made this with Mulberries, Strawberries, Raspberries, and Strawberries with Rhubarb.
1 cup fresh or frozen fruit, cut up small
3 tbsp chia seeds
2 tbsp organic maple syrup (or other sweetener like honey or agave)
4 tbsp water
(If using Rhubarb, I soften it a bit first by boiling it in the 4 tbsp of water.)
Mix together all ingredients. Transfer the mixture into a saucepan and cook on med-low heat for 4-5 minutes until jam sets. Transfer to a jam jar and enjoy on yogurt, toast, crackers, with salad or use as a topping for scones or other slices. Store in the fridge for up to 7 days.
It’s been a whirlwind of activity on the farm the past few weeks – this time of year, everything wants to be done at the same time. What to do when?! This morning we were trying to figure out what to tackle first and Ken said ‘Well, which of the 14 things that all need to be done now should we do first?’ The greenhouse is exploding with plants whose roots are seeking real soil. The garden ground has finally warmed enough we can plant more and more seeds directly, and barely keep ahead of the weeds. And all the plants are so new and tender that they are the most delicious for the bugs and beetles, so everything has to be covered with row cover (floating fabric that keeps the bugs out). But then again, it’s spring, so some of them – like the tiny and voracious flea beetle, are just emerging from the soil and so they come out under the row cover to a feast! These are the culprits responsible for the (ahem) ‘lacy’ radish leaves.
However, the greenhouse is looking rather empty these days – we have planted broccoli, cauliflower, cabbage, lettuce, beets, carrots, corn, eggplant, peppers, tomatoes, beans, melons and gladiolas in the past few weeks. Everything just needs a good soaking in order to take off. Since nature doesn’t seem to be cooperating, we are going to take matters into our own hands and start some irrigation. That should make it rain for sure!
And of course, it’s the perfect time to move and merge households – ha! Ellen and Aaron have sold their house in Portland and moved their things to the family farm. Farm succession in action has a lot less to do with tractors and spreadsheets than it does with 4 almost identical mesh strainers and too many laundry baskets.
We have been doing some experimenting with cover crops and planting crops directly into them – aka – no-till, with mixed success. The advantage is that the plant matter left on the surface provides nutrients and protection from the elements for the new plants, as well as benefiting the micro organisms that live in the soil (this is obviously extremely simplified – see Ken for a full scientific explanation of the complex symbiotic relationships at work here). The disadvantage is that sometimes it’s difficult to kill the cover crop, and sometimes the weeds get too established before the cover crop takes over. Just last week we tried a few rows of popcorn planted into rye that had been rolled, and initially it looked great, but now the rye is rising from the dead and seems like it might smother the poor popcorn. But have no fear – there is lots of popcorn that is not part of the experiment, looking great!
Finally, keep a look out for a calf in the next month – Utah, the Jersey cow, is due to calve any day!
FIRST PICK UP DAYS – TUESDAY, May 17th or SATURDAY, May 21st 11am-7pm
First Pick Up this week – if you haven’t received an email from us, give us a shout to make sure that you’re on the mailing list!
We’ve got asparagus coming out our ears and the rhubarb is looking bushy – it must be time to start the CSA! We are looking forward to seeing you all. We still have a handful of spots left, so if you have any friends or colleagues that are interested in joining, please encourage them – now is the time! We are also offering a limited number of half share options (pick up every 2 weeks).
If you’re new, this is how it works:
You can come on your pick up day (Tuesday or Saturday) any time 11am-7pm
Cross off your name on the list of members
Pack up your share (bring your own bags/basket/box)
If you can’t make it, please let us know and we can put aside your share in the white cooler – it will be in a box with your name on it to pick up the next day.
Remember – there will be more and more produce as the season progresses!
Bring some cash if you’d like to buy eggs ($6/doz)
If you have a working share, there will be a calendar to sign up for dates to come out to the farm – they are usually 2.5 hour blocks of time, so you will sign up for 2 different days for the season.
If you haven’t paid, please bring payment (in full or post-dated checks) with you to the first pick-up.
Caesar (a slightly tubby Golden Retriever) may greet you with a tail wag or a bark – he’s very friendly. Don’t leave out any tasty treats (i.e. bread) for him, though, because he’ll take advantage!
For our first pick-up, we are anticipating salad greens, pok choi, spinach, rhubarb, asparagus, and herbs. Seth will be sending an email about bread for this year shortly.
The Spring Fair was a wonderful experiment – if you attended, thanks for coming and please let us know your ideas for how to do it better next year, or what to keep! Maybe an industrial-sized popcorn maker next year ;). It was a beautiful day.
We have been busy planting (and planting and planting), assembling hoophouses and organizing our pastures. We just got 200 new trees to plant from Kettlecreek Conservation Authority (red oak, sycamore, sugar maple and white spruce) and will have to plant them this week…what were we thinking?!
FIRST PICK UP DAYS – TUESDAY, May 17th or SATURDAY, May 21st 11am-7pm
The Spring Fair was a wonderful experiment – if you attended, thanks for coming and please let us know your ideas for how to do it better next year, or what to keep! Maybe an industrial-sized popcorn maker next year ;).
Meet the Interns
There are five-ish (do you not count the childcarer or count the children?) interns this year, and you may have started to get to know them if you follow us on Facebook or Instagram (orchardhillfarmca).
Ellen, mama intern
Ellen & Aaron – Ellen is Ken & Martha’s daughter, and she and her family moved back to the farm this year. Aaron loves to work outside and has a lot of construction experience, as well as in accounting and clean energy finance. He grew up in Wisconsin and all of his family lives there still. Ellen grew up on the farm and started the CSA with Martha way back when. Since then, she has worked in coffee and fine dining and loves to cook and share her love of food – look forward to lots of cooking tips and recipes this year! Della will soon be 4 and Frannie is almost 6 months old.
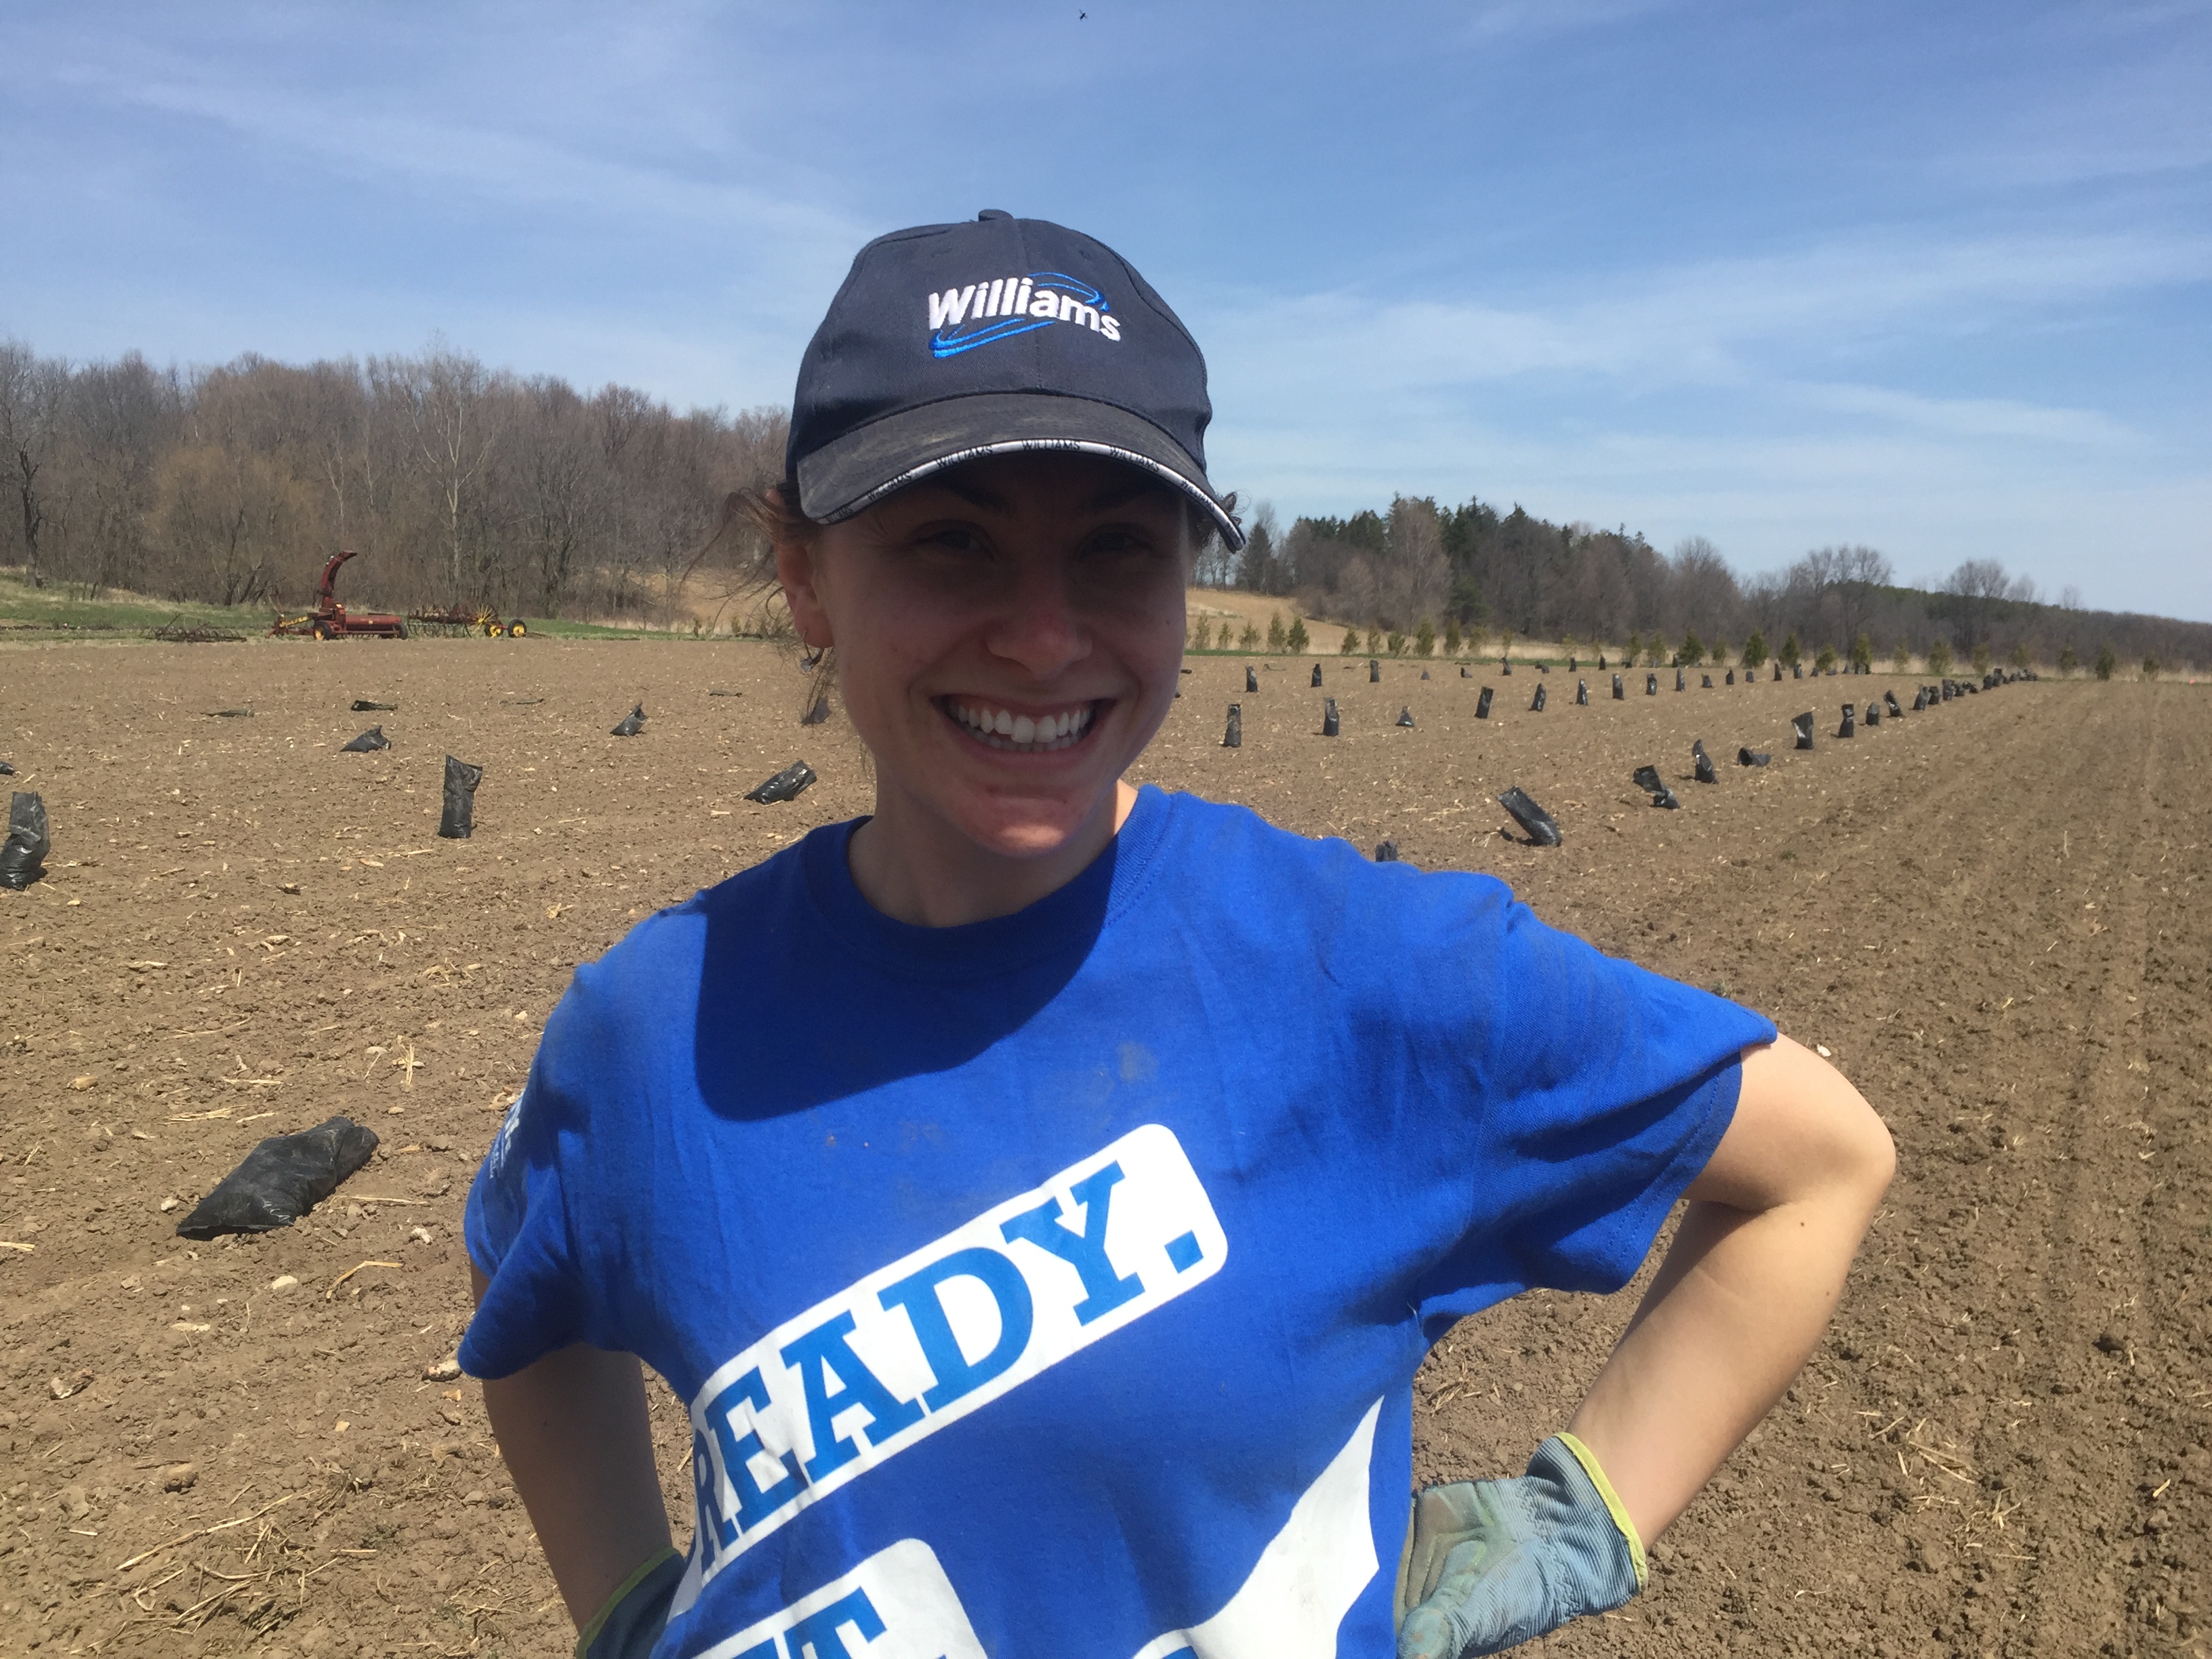
Kelsey
Kelsey – grew up in Tillsonburg and just graduated from Western with a degree in Anthropology. She loves gardening, cross country running and baking. She rode horses when she was younger and used to work on a lavender farm.
Bryan – comes to us via Pickering and Parry Sound. He
Bryan at leisure
loves animals and the outdoors – ask him about bird songs, or toads! He started an electrician apprenticeship, and has worked a lot of conservation jobs. Last year he worked at a farm that we know well – Meeting Place Organic Farm – and worked with draft horses there. In the fall he’ll be starting his study of Heritage Masonry at Algonquin College.
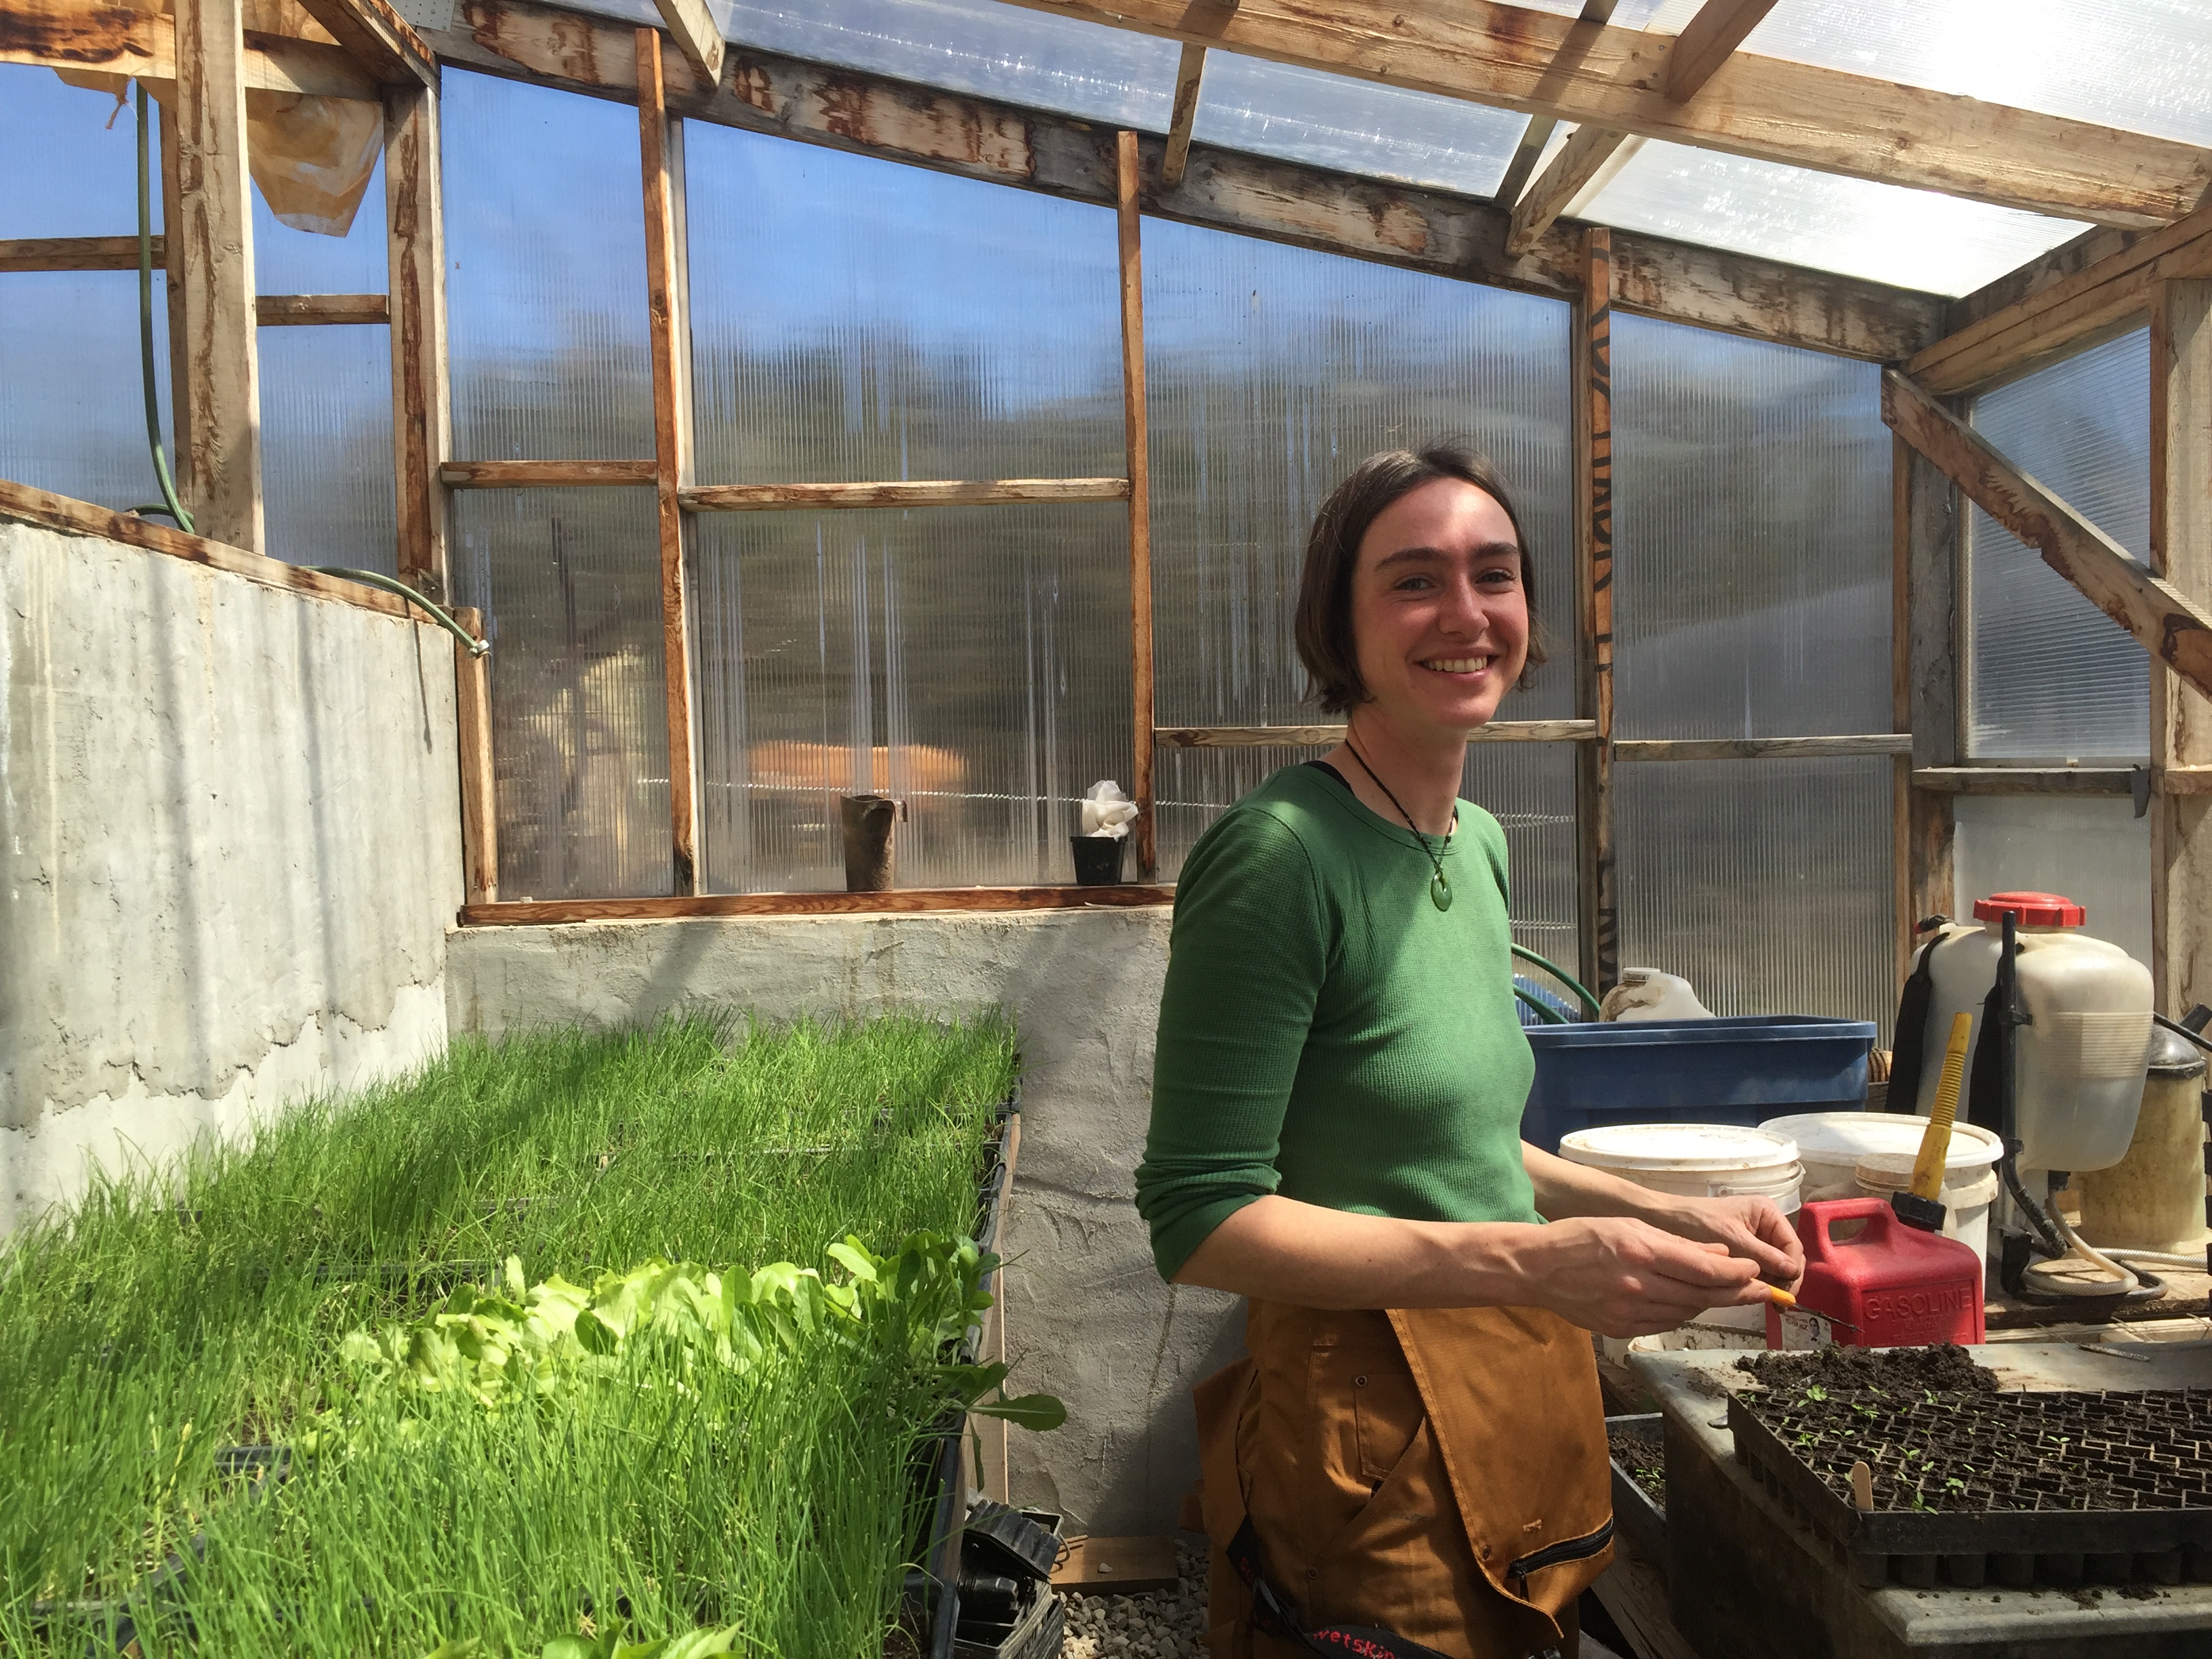
Heidi working in the greenhouse
Heidi – grew up in Toronto, but looked forward to long weekends when her family would leave the city and visit her grandparents at their family farm. She graduated from Lakehead University and spent 4 years gardening and working on Cortes Island in British Columbia. For the past several years she has been doing strawbale construction and carpentry. She’s excited to get back to farming!
Kombucha Tutorial
Jim talking kombucha at the Spring Fair
Jim Conrad is an all around handy guy – he’s been helping us out on the farm with all kinds of menial and skilled tasks (metal working, small machines, window installation, painting, picking, planting) for a while now – a friend and a member of the garden. At home he’s equally as handy, and makes kombucha on the regular. Here’s his breakdown:
Last Saturday I attended the Orchard Hill Farm Spring Fair – what a great turn out! I was quite surprised at the interest in fermenting.
Let’s talk Kombucha! There is a lot of buzz around about this fermented tea drink and it’s now showing up everywhere. Kombucha comes from fermenting various types of tea in sugar water with the use of a SCOBY. ‘SCOBY’ stands for Symbiotic Colony Of Bacteria and Yeast and has been around for years…but let’s not get too into the history of it – there’s lot of easy-to-find information on the internet.
This is the process that I’ve been using for several years now:
Kombucha
3 quarts water
1 cup sugar
4 tea bags (4 black, or 2 black and 2 green, or 2 black and 2 ginger)
1 Scoby
1/2 to 1 cup starter (Kombucha from previous batch)
Bring the water to a boil then add the cup of sugar.
Once the sugar has dissolved, add the 4 tea bags and let it boil for 5 minutes.
Remove the tea bags and allow the sweet tea to cool to room temperature.
Place the room temperature sweet tea into a glass container for the fermenting process.
Add the starter and Scoby.
Cover with a cloth to keep anything out of the brew and allow the Scoby to breathe.
Place the container somewhere warm (65-85F) and out of direct sunlight.
At the 8-day mark you can taste the Kombucha to see if it is still sweet. If you are happy with the taste you can process it and if it’s too sweet just let it ferment longer (if you let it go too long it will get very tart).
I process the Kombucha by removing the Scobys (there will be two now) and half to 1 cup of the kombucha to be used as my next starter.
Filter the kombucha through a cloth and place in the refrigerator.
If you want to do a second fermentation, add some fruit juice, fruit, herbs, or ginger and put a secure lid on. Set on counter for a day or two (be careful when you open it as there will be a gas build up). Enjoy!
There is a lot of information on the benefits and adverse effects of drinking Kombucha. Take the time to do your research to make sure this is something you want to do.