All the animals can feel it. Yesterday Florence, the cow (she’s pregnant – due in June) was hopping and tossing her head when I forking straw into her pen, and the horses came trotting into the barn wildly when I let them in for their dinner. The days are noticeably longer! It’s about time! I’m putting the finishing touches on the greenhouse plan, and we are ready to fire it up in two weeks for the longest maturing crops – onions, some of the cutting flowers and herbs.
Ken is finishing up kitchen cabinets and counters for the bunkhouse so that he can start training the two youngest horses in March. Martha has been helping with the cabinetry, weaving and is now re-upholstering a chair!
As I’ve been planning the garden, I’ve added A LOT more flowers to the mix – I’m planting rows of different flowers (zinnias, calendula, borage, nasturtiums and marigolds) within the garden and to divide different varieties, to attract beneficial insects and to help support natural pollinators. Hopefully it will provide more pollination for our fruiting plants, and maybe attract insects that eat the non-beneficial insects. And if nothing else, it will be beautiful!
It’s time to sign up for the CSA! If you know anyone who might like it, send them our way!!
Tag: Community Shared Agriculture
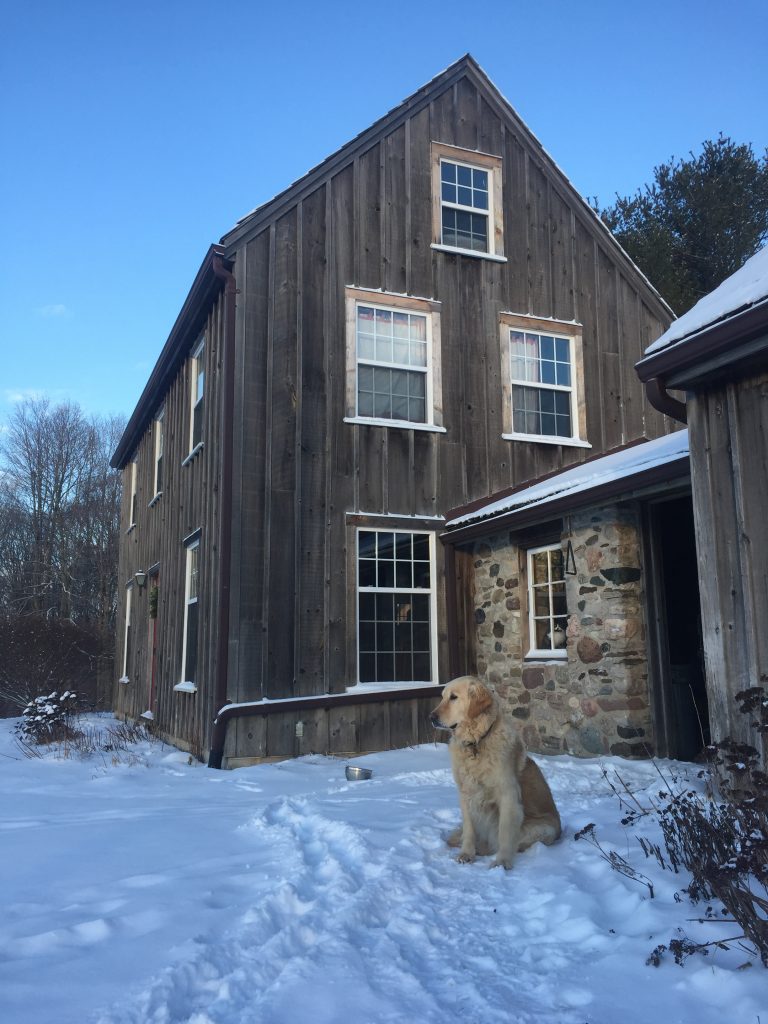
Winter Wonderland
Bunkhouse Construction ~ Seeds Ordered ~ Farm Dinners ~
It finally feels like winter here on the farm. It’s been nice to have some snow stick around for a few days and give us a break from the never-ending mud! I’ve been enjoying seeing familiar names roll in for the CSA, and a few new ones – there is still room to sign up if you haven’t.

We are keeping busier than normal this winter with the slow and steady construction on the bunkhouse (Martha’s been wondering if we should call it something different, but Ken’s happy to keep calling it the bunkhouse). We have installed the rest of the second floor, which involved cutting down trees in the woodlot and sawing them, making them into beams and installing them in the timberframe already standing, and then laying the floorboards. The floorboards were dried in the woodkiln that you CSA members last year may remembered being constructed in August. Now we have electricians running the wire to install the electricity, and when that is finished, we are going to get busy with insulation, vapor barrier, drywall, taping, mudding and painting! Martha and Ken are hoping to have an operational kitchen and bathroom by April, when the interns arrive.

In January, we mulched the strawberries – it’s always one of the last outdoor jobs of the season – we got to it a little bit late this year, but they’re pretty forgiving. We use our own organic straw for the mulching, which is nice because sometimes it’s hard to find organic straw to buy for that sort of thing. The straw is from the oats, wheat, spelt or rye that we use on the farm to feed to the animals, and for Seth’s bread at La Houlette de Vie. The strawberries like to be protected from the wind and from the freeze/thaw cycles that often accompany the warm up in the spring. When it warms and the plants start to grow again in the spring, we rake the straw from the top of the rows into the aisles and it helps to insulate the soil, prevent erosion, keep the strawberries clean and provides a nice soft place for us to kneel while we pick the berries in June.
We have hired three new interns for this season – a couple with quite a bit of farming experience in Quebec and Germany, and a fellow from Guelph with a culinary background. It’s always interesting to get to know a new crew of people and see what they have to bring to the table. They will arrive April 2nd and stay until October.

I’ve been planning the garden – what will go where, what seeds we have, what we need to order. I ordered seeds this year from Tourne Sol, which is a co-operative organic farm in Quebec, founded by one of our past apprentices. Here are some of the new things that I’ve ordered this year – fava and edamame beans, ground cherries, flint corn – a relatively rare variety called Roy Calais – that has both red and yellow kernels and a really lovely corn-y flavor to the cornmeal…the dry corn is a test and you’ll probably only get a small portion of cornmeal, but it will be fun to try and may show up in some farm dinners in the future. We also have poblano peppers (when they’re red and dried we call them ‘ancho’ peppers – same pepper though) in the order, and some ‘snow leopard’ melons that are white with green markings on the outside, with a fragrant orange flesh. I also went a little nuts with the flower order – as long as I can get them to grow into plants, you should expect a new and different variety of flowers in the garden for picking this year! I love architectural plants and so I’ve ordered some that I will use the foliage or seeds as décor, and some more flowers suitable for drying. I love love love having flowers in the pick up room and in the house in the summer. It’s got to be one of my top 10 favorite things about living on the farm, which I think is a little silly sometimes, but the heart wants what the wants!
The other thing in the works is some loose planning of the farm dinners for 2017! I’ve got a 50 seat dinners planned for Saturdays June 17th, July 8th and September 23rd. I expect tickets will go fast, and CSA members will get first dibs. Stayed tuned for more details!

What have you been cooking this winter? A few members have said that they’re just working through the last of their squash, or root vegetables. We have been eating well here on the farm, with a lot of vegetables in the root cellar and cooler. Last week I made root vegetable latkes – like potato pancakes, but with potato, celeriac, rutabaga and onion, bound with egg and cornstarch. We have been eating corn and peas from the freezer and just unearthed a motherlode of strawberries, so we’ve been making smoothies and ‘strawberry shakes’ – a staple of my childhood – growing up on a strawberry farm had its perks! We have also been enjoying the ‘fruits’ of our preserving labor – tomato soup made from tomato sauce that we canned, jams and jellies and juices, that eggplant pickle that I wouldn’t shut up about in August – so delicious! I also find a lot more time to ferment in the winter – seems like the wrong season, but we still have so many root vegetables that are perfect for fermenting into pickles and krauts.
Take care and stay warm.
Ellen
Fennel and Zucchini
Potato Trial and Bunkhouse Renovation

It is a sure sign that fall is progressing when the flowers in the garden take on their rich fall colours. It is hard to believe that we only have three weeks left after this until the end of our main season CSA. The last Main Season Pick-up days are Tuesday, October 4th and Saturday, October 8th.

This season we took part in a trial for trying out new crosses for organic potato production. The potatoes were dug last week and we selected the varieties that performed the best, both in terms of yield and leaf hopper resistance. We have a number of selections to keep and grow out again next year to see how they perform. At the end of the month researchers are coming for a field day and we will cook some for a taste test. Ken is looking forward to continuing to work on this project in the years to come.

As we make room for the next generation on the farm, Ken and Martha are looking to move into what has been the bunkhouse. It is a timber frame with straw bale walls. Unfortunately, the lime sand plaster layer which covers the straw bales, particularly on the east wall, developed cracks. They were patched, but re-cracked and water got in and the lime sand outer layer separated from the clay under layer. Apparently, we should have added lime to the clay layers to help bind the lime sand layer. It would also have been better to have a larger overhang and perhaps not taken the straw bale wall so high on the east side. An added problem is that there is also some serious air leaks, making it challenging to heat in the winter months. As a result, we have decided to remove the straw bale walls and replace them with stud wall construction.

We need to dry some of our lumber to use in the renovations. Aaron and Heidi have been building a solar wood kiln to speed up the drying process.

Ken is continuing with is no till drill and has planted a series of cover crops and is expecting to plant fall grain later this month both for the horses and for Seth to mill and make into his delicious bread.
The Bountiful Season

The bounty is upon us – this week the share includes potatoes, melons and sweet corn. As well as some of the things that you’ve been getting for a week or two (beans, broccoli, summer squash). The eggplant, tomatoes and peppers are just starting. This might be my favourite cooking season – although when there are so many delicious vegetables and fruits abound, not very many things require cooking!

This week we harvested all the garlic that we planted last fall. It looks beautiful! It has turned into the ‘Orchard Hill Blend’ of garlic varieties – a few that we got from other farmers years ago, one smuggled from Italy by a garden member (not condoned!). Each year we save the very best heads of garlic to divide into cloves and plant in the fall. In this way, we have tailored the garlic that grows best in our particular micro region, and have produced some really lovely heads of garlic. We gather it in bundles and hang it in the eaves of the barn to dry and cure before cleaning it. When it is thoroughly dry, we can braid it or cut it off and store it for the winter. The garlic that you got in your share last week was fresh, meaning it wasn’t cured, and won’t store for months like the cured ones.
We have what might be the most beautiful watermelon harvest ever (per Martha) – they loved that hot dry weather that we had earlier in the season! You’ll notice that the watermelons that we grow are smaller than the ones you’ll typically find in the big grocery stores, but that’s purposeful because then they are the perfect size for a couple of people, rather than having a huge melon that sits in your fridge. You’ll also find that the melons are all different colours inside – yellow, pink, and orange. In the next few weeks you’ll receive a few different types of melons.

Florence the orphan calf is doing well – but she’s a fence breaker! She won’t stay in the electric fence. We tried putting her in with the chickens, but she tried to escape from there too. So she’s stuck in the green round pen. Each night Bryan takes her for a walk on a rope. Last night he took her down to the other end of the farm to try and make friends with the runaway beef cow (nicknamed Houdini). Some of you may remember that Houdini escaped from the pasture at the other end of the farm on the day of the very first pick up – we thought that she would get eaten by coyotes and we searched and searched for her – but she’s still alive! She’s just a wild cow that we can’t catch – she’s bigger now, too big to tackle. She hangs out in the swamp and we see her every once and a while, and try to corral her into the pasture, but then she just jumps through the fence again! The theme of the summer is weeds and runaway cattle.
Here are a few notes and recipes for some of the vegetables that you’ve been getting!
Eggplant
What a versatile vegetable! It goes Asian, Italian, or French, it melds beautifully with almost any flavor that you can throw at it. A lot of recipes call for salting slices of eggplant (slicing it, sprinkling it with salt, letting it sit and drying it off) – this serves two purposes – 1. Drawing out excess moisture so that it won’t have as much water and 2. Helping to mitigate the ‘bitter’ flavor. In my experience, if your eggplant is fresh, not over-mature, and cooked properly, bitterness isn’t a problem. And if they’re eggplant from your share – you don’t have to worry about it. It’s also easy to cook because you can’t overcook it! It tastes most delicious (in my opinion) when it’s charred on the outside.
Simple Roasted Eggplant
1 eggplant
2 Tablespoon olive oil
½ tsp salt
White pepper (or black), ground
Preheat the oven to 400˚
Pierce the outside of a whole eggplant with a fork.
Throw it in the oven on a baking sheet and bake for 45 minutes or an hour, until the skin is blistered and it looks shriveled and completely soft.
Take it out of the oven and let it cool 10 min. Cut it in half and scoop the soft innards out of the skin into a bowl. Add the olive oil, salt and a little pepper and mix well.
Serve on toast, toss with pasta (add some garlic and chopped tomatoes), or throw it in a burrito.
Baba ganoush variation – add a clove of crushed garlic, 1-2 Tablespoons tahini and 1-2 Tablespoons lemon juice.

Simple Grilled (Blackened) Eggplant
1 eggplant
2 Tablespoons olive oil
½ tsp salt
Black pepper, ground
Slice the eggplant in inch thick slices, lay out on a baking sheet and brush with olive oil on one side. Sprinkle that same side with salt and pepper.
Preheat the grill on high heat for 10 minutes.
Throw the eggplant on, oiled side down, and don’t move it or fuss with it. Cook for 10 minutes on high with the lid closed. Don’t turn it over, cook it just on one side. When it’s done, you should be able to see the top side bubbling a little bit and the bottom will be almost black. Use tongs or a metal spatula to take the eggplant off the grill. Don’t worry! It’s not burned, it’s ‘blackened’! And it’s the most delicious thing ever – the eggplant is earthy and smoky, suddenly more than just a vegetable.
Blitz it in the food processor to use for the baba ganoush (above), use in an eggplant parmesan recipe, or eat it as is!
Soba Noodles with Eggplant and Mango
This recipe is from the cookbook ‘Plenty’ – it’s an incredible vegetable cookery book with tons of interesting combinations of flavours, leaning in the middle-eastern direction. There are a lot of eggplant recipes. This one sounds crazy, but it’s actually really, really good.
Serves 6
½ C rice vinegar
3 Tbsp sugar
½ tsp salt
2 garlic cloves, crushed
½ fresh chile, seeds removed, finely chopped
1 tsp toasted sesame oil
grated zest and juice of one lime
2 eggplants – cooked (follow Blackened Eggplant recipe, above) and chopped
8-9 oz buckwheat soba noodles
1 large mango, cut into ½ inch dice
1 C basil or thai basil leaves, chopped
2 C cilantro leaves, chopped
½ red onion, very thinly sliced
In a small saucepan gently warm the vinegar, sugar and salt for up to 1 minute just until the sugar dissolves. Remove from the heat and add the garlic, chile pepper and sesame oil. Allow to cool, then add the lime zest and juice.
Cook the soba noodles in plenty of salted water, stirring occasionally. They should take 5-8 min to become tender but still al dente. Drain and rinse well under running cold water. Shake off as much of the excess water as possible, then leave to dry on a dish towel.
In a mixing bowl toss the noodles with the dressing, mango, eggplant, half of the herbs and the onion. You can now leave this aside for 1-2 hours. When ready to serve add the rest of the herbs and mix well, then pile on a plate or in a bowl.
Parsley
We have more than a row (320 ft!) of Italian flat leaf parsley this year, because I love it! I.must.always.have.parsley. It’s one of my staples – in the winter it substitutes for salad greens when all the things in the grocery store are flaccid things from California, and in summer it gets chopped up in almost every grain, bean or vegetable salad. But it seems to be languishing in the pickup room. I think flat parsley is far superior to curly parsley because it doesn’t tickle my mouth. I could come up with a few more reasons – it doesn’t hold the dirt so stubbornly, it looks more elegant when finely chopped, and I think the flavor is less bitter and more fragrant than curly parsley. All that being said, they are pretty much interchangeable in recipes.
It’s also a nutritional powerhouse! It’s packed full of all kinds of things I’ve barley heard of (volatile compounds) as well as Vitamin K, C, and A.
Parsley is best fresh or barely cooked, and will store well for a week or more, if stored loose in a plastic bag in the refrigerator.
Parsley Pesto
1 C flat leaf parsley leaves (from one big bunch)
2 cloves garlic
1 cup olive oil
large pinch salt
6-8 turns of white pepper (or black)
Remove the leaves from the stem of the parsley – you don’t have to be too picky because it’s going to be blended up, but too many stems won’t make a nice pesto. Combine all the ingredients in a blender or food processor. Puree until it’s a texture that you like. Taste and adjust as necessary. Store in a covered container in the fridge for up to a week. Shake or stir well before using.
Brush on bread before toasting for a crostini (aka bruschetta), add to any soup just before serving, use in a pasta sauce at the last minute. Also great tossed with any grilled vegetable hot off the grill (i.e. peppers, zucchini, eggplant, carrots).
Green Gazpacho
Another one from ‘Plenty’ – it’s a chilled soup, super fast and easy to make, fantastic on a hot day, and a great way to use up some of those cucumbers. It’s great served with croutons and a drizzle of olive oil. Serves 6
2 stalks celery (leaves too)
2 small green peppers, seeded
1 ¼ lbs cucumber (6 small or 2-3 large)
3 slices stale white bread, no crusts
1 fresh green chile (like jalapeno)
4 garlic cloves
1 tsp sugar
1 ½ C walnuts, lightly toasted
6 C baby spinach (or 4 C swiss chard)
1 C basil leaves
2 Tbsp chopped parsley
4 Tbsp sherry vinegar (red wine vin in a pinch)
1 C olive oil
3 Tbsp greek yogurt
about 2 C water
1 C ice cubes
2 tsp salt
white pepper
Roughly chop the celery, bell peppers, cucumbers, bread, chile and garlic. Place in a blender and add the sugar, walnuts, spinach, basil, parsley, vinegar, oil, yogurt, most of the water, half the ice cubes, the salt and some white pepper. Blend the soup until smooth. Add more water if needed to get your preferred consistency. Taste the soup and adjust the seasoning. Lastly, add the remaining ice and pulse once or twice, just to crush it a little. Serve at once.
Happy July
 An introductory, housekeeping item – it’s Ellen behind the keyboard here. I have taken over managing the blog, facebook page and instagram account. Martha will occasionally post something, but we thought that you might like to know who you’re reading.
One of things I love about farming and living a life that is so seasonal is that patterns start to emerge between events, plants and animals, sometimes seemingly otherwise unrelated. The other day I mentioned that Home County Music Festival was coming up to my mom and she said ‘oh, that means we need to put the electric fence up around the sweet corn’ (to keep the raccoons out), because she remembers the past few years, rushing around to get that done before going to the music festival.
2016 is shaping up to be the year of the weeds! Some combination of no-till cover crops, lack of rain, and who knows what has created the highest weed pressure of any year that my parents can remember. Upside – you get to feel like a superhero, swooping in to save the poor plants from certain doom in the pigweed jungle. Every 2 weeks. Downside – it feels like there’s no time to do anything but weed. It has such an effect that we have decided to change the location of the 2017 garden – there were so many weeds coming up in the field destined for vegetables that we have switched it up and it will now be planted to buckwheat (and a few more cover crops).
The garlic should be ready to harvest in the next week or two and it looks glorious! The heads are big and 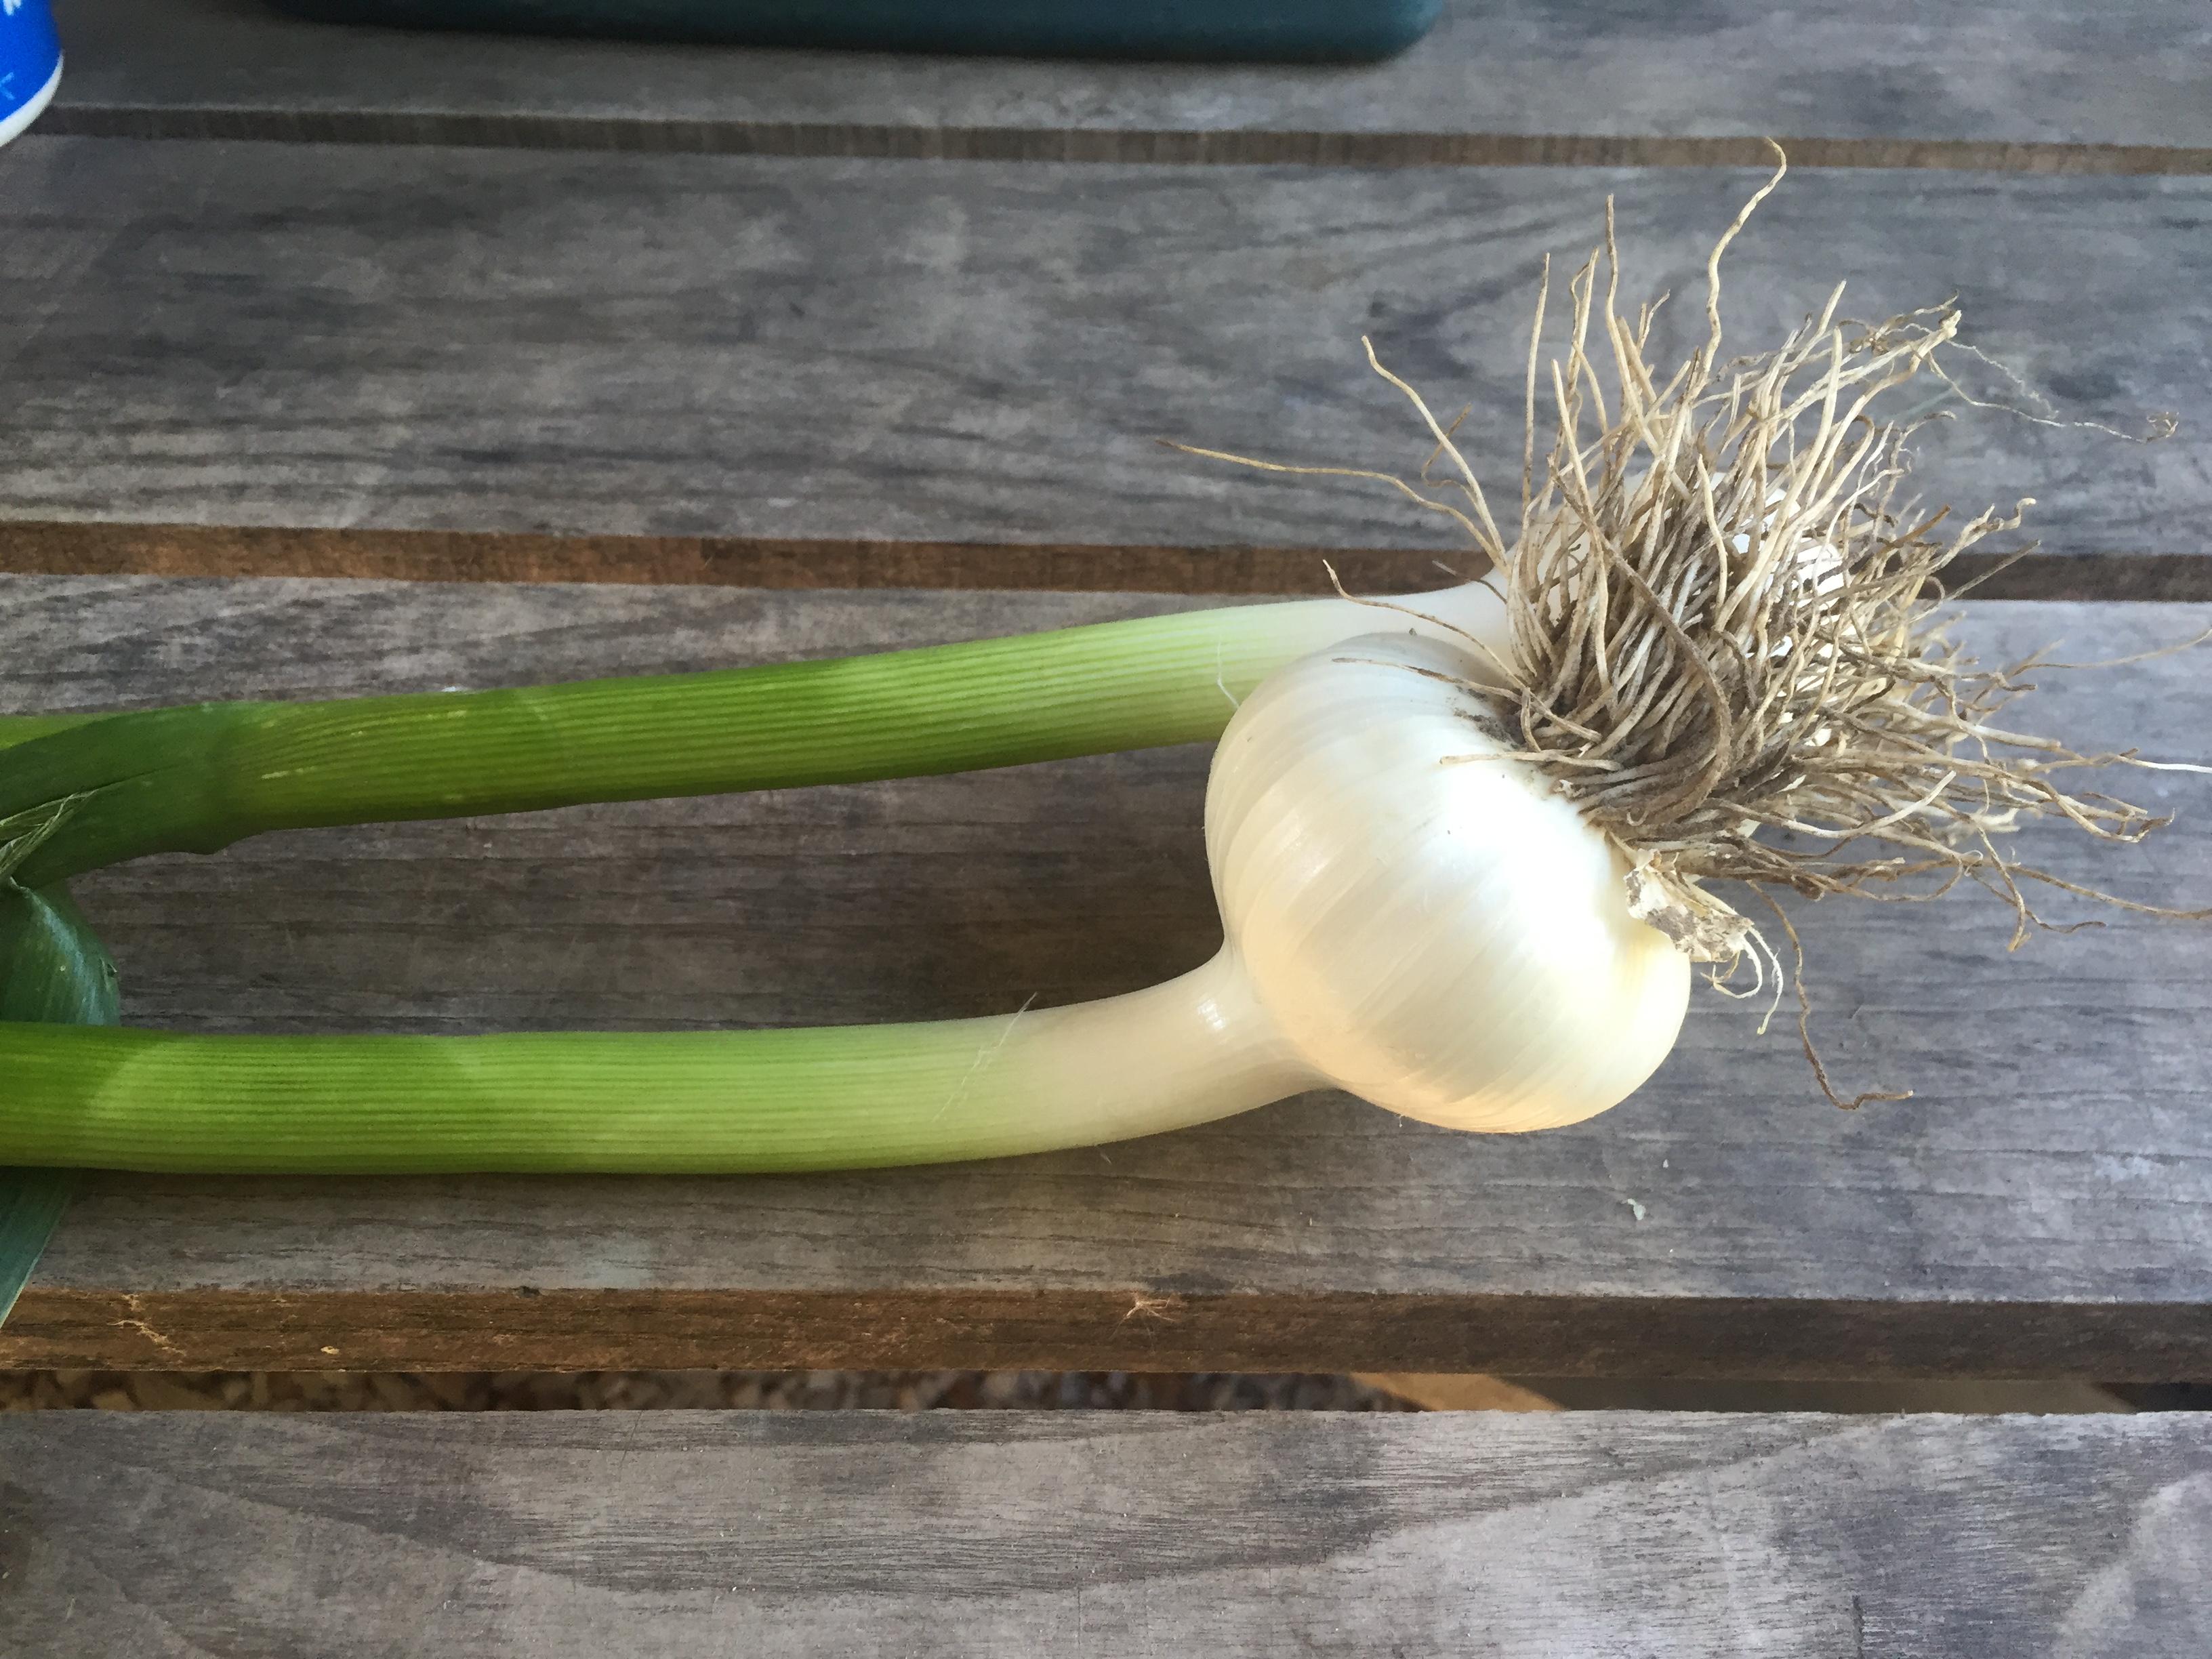 beautiful. The cucumbers are getting off to a slow start because Martha went to a seminar this winter and came away with recommendations for cucumber varieties, and also the idea that cucumbers shouldn’t be transplanted because it sets them back too much – best to just get them in the soil sooner (in a hoop house). Sounds great! However, only 5-10% of the expensive, special cucumber seed germinated. So we replanted and those plants are coming along and we will have lots of cucumbers in a month or so….and in other good news, tomatoes, peppers and melons love all this hot dry weather, so they should be bountiful.
 Florence the calf is doing well. She guzzles her milk each day, three times a day. Bryan takes her for a walk most evenings and she loves to suck on fingers (or hands, or baby feet!). We have brought in almost all the first cut hay now – it’s been great haying weather!
The multigenerational family farm operation is going well so far – it’s a challenge to get as much done as you think you will with small children in the mix (or it looms large from my perspective perhaps). But it’s very special to me to see the relationship develop between my parents and my children – and their relationship with my grandmother! She’s come a few times to help keep an eye on the children while we keep on top of stocking the pick up room. But it’s also interesting and heart tugging to see Della develop a relationship with the plants and animals that I spent so much time with when I was a child – making flower crowns with spring beauties, following toads, making forts for worms.  Or picking blueberries for everyone for dinner! Ken and Martha are starting to plan for a renovation of the bunkhouse – adding a kitchen and bathroom, and probably replacing all the walls – that’s all! They shall start their (semi) retirement in style next year.
Here are a few recipes from garden members –
Spinach Pesto & Artichoke Pasta Salad
From Vicki Coughlin (at Telegraph House in Port Stanley) –
I didn’t have the artichokes (omitted them) and used this recipe hot as a side dish for dinner, and thought it was a brilliant way to use fresh organic spinach from Orchard Hill! (farmer note – it would also be delicious with swiss chard!)
250 g fusilli
1 garlic clove
2 cups packed spinach
1/4 cup toasted sliced almonds
1/4 cup parmesan
1 tablespoon lemon juice
1/4 tsp salt
1/3 cup olive oil
1/4 cup 2% plain yogurt
398 -ml can artichoke hearts, drained and chopped.
- Cook pasta following package directions, but omitting salt, until tender. (Drain & rinse with cold water if making salad)
- Whirl garlic clove with spinach, almonds, parmesan, lemon juice and salt in a food processor until finely chopped. Gradually whirl in oil until smooth.
- Combine pesto with yogurt in a large bowl. Stir in pasta and artichokes if using.
Chia Fruit Jam
From Jackie Martens –
This is very quick and easy to make and I have made this with Mulberries, Strawberries, Raspberries, and Strawberries with Rhubarb.
1 cup fresh or frozen fruit, cut up small
3 tbsp chia seeds
2 tbsp organic maple syrup (or other sweetener like honey or agave)
4 tbsp water
(If using Rhubarb, I soften it a bit first by boiling it in the 4 tbsp of water.)
Mix together all ingredients. Transfer the mixture into a saucepan and cook on med-low heat for 4-5 minutes until jam sets. Transfer to a jam jar and enjoy on yogurt, toast, crackers, with salad or use as a topping for scones or other slices. Store in the fridge for up to 7 days.
Summer is here!
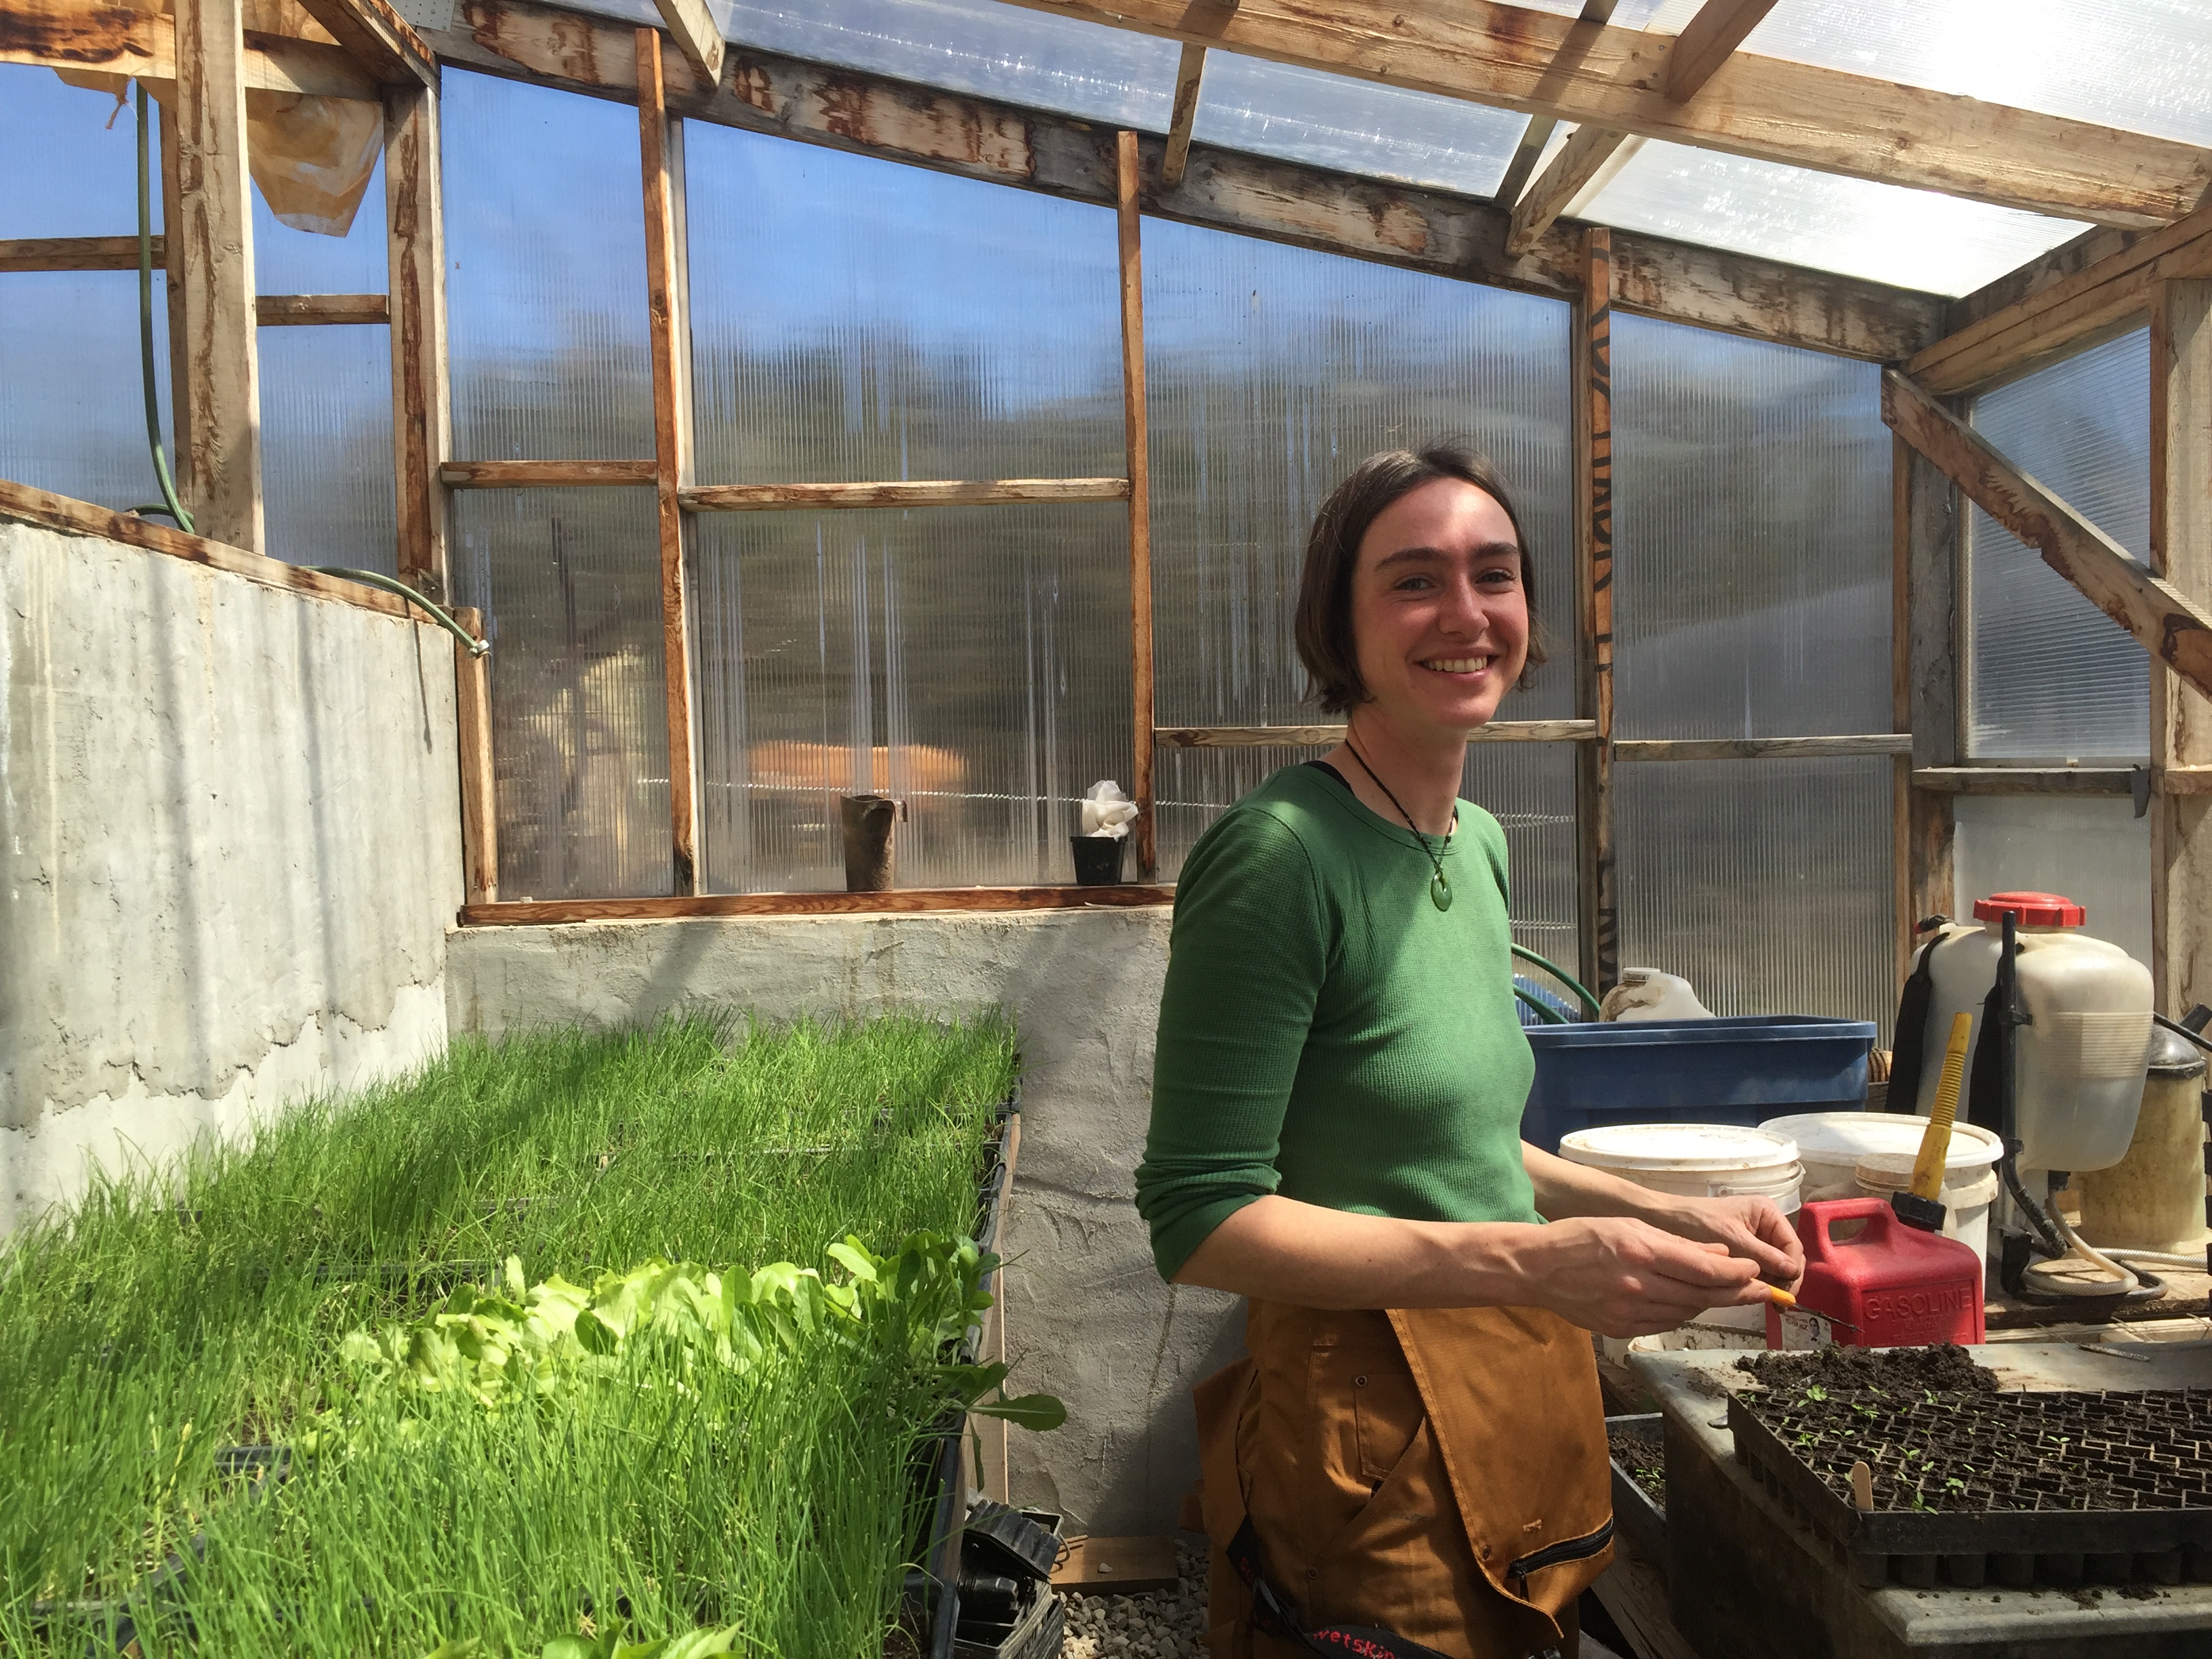
 It’s been a whirlwind of activity on the farm the past few weeks – this time of year, everything wants to be done at the same time. What to do when?! This morning we were trying to figure out what to tackle first and Ken said ‘Well, which of the 14 things that all need to be done now should we do first?’ The greenhouse is exploding with plants whose roots are seeking real soil. The garden ground has finally warmed enough we can plant more and more seeds directly, and barely keep ahead of the weeds. And all the plants are so new and tender that they are the most delicious for the bugs and beetles, so everything has to be covered with row cover (floating fabric that keeps the bugs out). But then again, it’s spring, so some of them – like the tiny and voracious flea beetle, are just emerging from the soil and so they come out under the row cover to a feast! These are the culprits responsible for the (ahem) ‘lacy’ radish leaves.
 However, the greenhouse is looking rather empty these days – we have planted broccoli, cauliflower, cabbage, lettuce, beets, carrots, corn, eggplant, peppers, tomatoes, beans, melons and gladiolas in the past few weeks. Everything just needs a good soaking in order to take off. Since nature doesn’t seem to be cooperating, we are going to take matters into our own hands and start some irrigation. That should make it rain for sure!
And of course, it’s the perfect time to move and merge households – ha! Ellen and Aaron have sold their house in Portland and moved their things to the family farm. Farm succession in action has a lot less to do with tractors and spreadsheets than it does with 4 almost identical mesh strainers and too many laundry baskets.
We have been doing some experimenting with cover crops and planting crops directly into them – aka – no-till, with mixed success. The advantage is that the plant matter left on the surface provides nutrients and protection from the elements for the new plants, as well as benefiting the micro organisms that live in the soil (this is obviously extremely simplified – see Ken for a full scientific explanation of the complex symbiotic relationships at work here). The disadvantage is that sometimes it’s difficult to kill the cover crop, and sometimes the weeds get too established before the cover crop takes over. Just last week we tried a few rows of popcorn planted into rye that had been rolled, and initially it looked great, but now the rye is rising from the dead and seems like it might smother the poor popcorn. But have no fear – there is lots of popcorn that is not part of the experiment, looking great!
 Finally, keep a look out for a calf in the next month – Utah, the Jersey cow, is due to calve any day!
First Pick Up This Week!
FIRST PICK UP DAYS – TUESDAY, May 17th or SATURDAY, May 21st 11am-7pm
First Pick Up this week – if you haven’t received an email from us, give us a shout to make sure that you’re on the mailing list!
We’ve got asparagus coming out our ears and the rhubarb is looking bushy – it must be time to start the CSA! We are looking forward to seeing you all. We still have a handful of spots left, so if you have any friends or colleagues that are interested in joining, please encourage them – now is the time! We are also offering a limited number of half share options (pick up every 2 weeks).
If you’re new, this is how it works:
- You can come on your pick up day (Tuesday or Saturday) any time 11am-7pm
- Cross off your name on the list of members
- Pack up your share (bring your own bags/basket/box)
- If you can’t make it, please let us know and we can put aside your share in the white cooler – it will be in a box with your name on it to pick up the next day.
- Remember – there will be more and more produce as the season progresses!
- Bring some cash if you’d like to buy eggs ($6/doz)
- If you have a working share, there will be a calendar to sign up for dates to come out to the farm – they are usually 2.5 hour blocks of time, so you will sign up for 2 different days for the season.
- If you haven’t paid, please bring payment (in full or post-dated checks) with you to the first pick-up.
- Caesar (a slightly tubby Golden Retriever) may greet you with a tail wag or a bark – he’s very friendly. Don’t leave out any tasty treats (i.e. bread) for him, though, because he’ll take advantage!
For our first pick-up, we are anticipating salad greens, pok choi, spinach, rhubarb, asparagus, and herbs. Seth will be sending an email about bread for this year shortly.
The Spring Fair was a wonderful experiment – if you attended, thanks for coming and please let us know your ideas for how to do it better next year, or what to keep! Maybe an industrial-sized popcorn maker next year ;). It was a beautiful day.
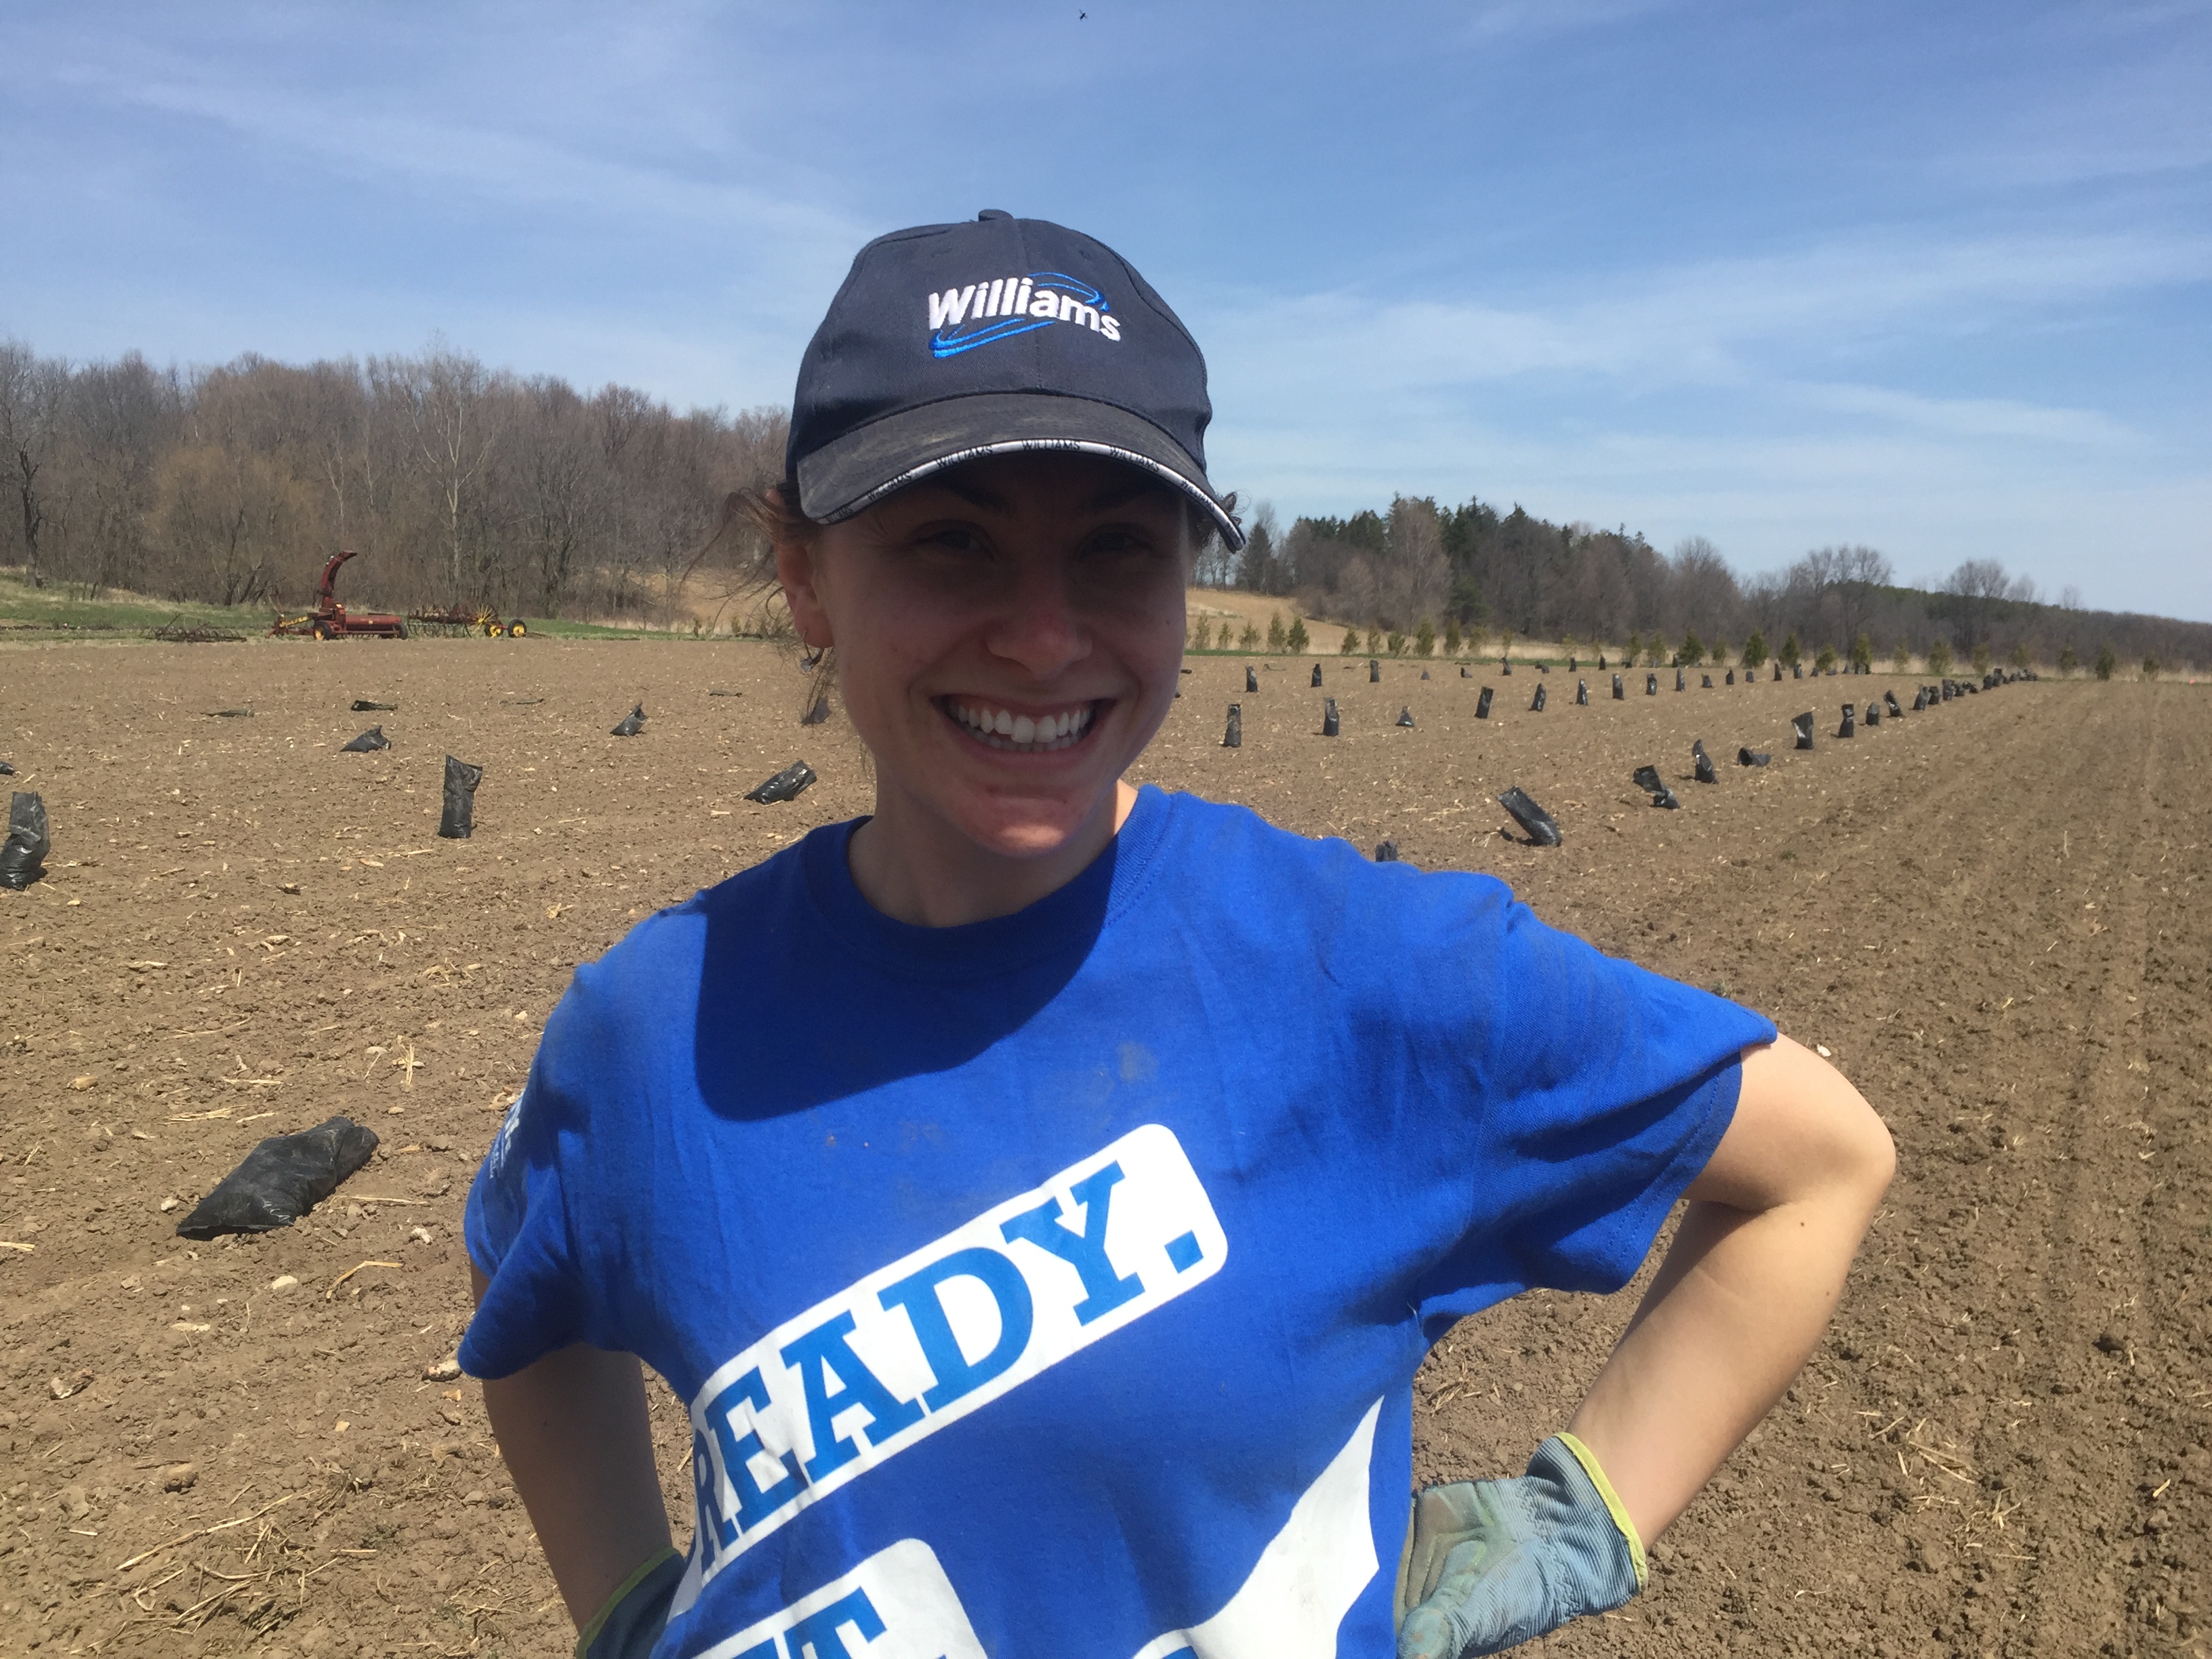
We have been busy planting (and planting and planting), assembling hoophouses and organizing our pastures. We just got 200 new trees to plant from Kettlecreek Conservation Authority (red oak, sycamore, sugar maple and white spruce) and will have to plant them this week…what were we thinking?!
See you soon!
First Pick Up, Meet the Interns & Kombucha
FIRST PICK UP DAYS – TUESDAY, May 17th or SATURDAY, May 21st 11am-7pm
The Spring Fair was a wonderful experiment – if you attended, thanks for coming and please let us know your ideas for how to do it better next year, or what to keep! Maybe an industrial-sized popcorn maker next year ;).
Meet the Interns
There are five-ish (do you not count the childcarer or count the children?) interns this year, and you may have started to get to know them if you follow us on Facebook or Instagram (orchardhillfarmca).

Ellen & Aaron – Ellen is Ken & Martha’s daughter, and she and her family moved back to the farm this year. Aaron loves to work outside and has a lot of construction experience, as well as in accounting and clean energy finance. He grew up in Wisconsin and all of his family lives there still. Ellen grew up on the farm and started the CSA with Martha way back when. Since then, she has worked in coffee and fine dining and loves to cook and share her love of food – look forward to lots of cooking tips and recipes this year! Della will soon be 4 and Frannie is almost 6 months old.
Kelsey – grew up in Tillsonburg and just graduated from Western with a degree in Anthropology. She loves gardening, cross country running and baking. She rode horses when she was younger and used to work on a lavender farm.
Bryan – comes to us via Pickering and Parry Sound. He

loves animals and the outdoors – ask him about bird songs, or toads! He started an electrician apprenticeship, and has worked a lot of conservation jobs. Last year he worked at a farm that we know well – Meeting Place Organic Farm – and worked with draft horses there. In the fall he’ll be starting his study of Heritage Masonry at Algonquin College.
Heidi – grew up in Toronto, but looked forward to long weekends when her family would leave the city and visit her grandparents at their family farm. She graduated from Lakehead University and spent 4 years gardening and working on Cortes Island in British Columbia. For the past several years she has been doing strawbale construction and carpentry. She’s excited to get back to farming!
Kombucha Tutorial

Jim Conrad is an all around handy guy – he’s been helping us out on the farm with all kinds of menial and skilled tasks (metal working, small machines, window installation, painting, picking, planting) for a while now – a friend and a member of the garden. At home he’s equally as handy, and makes kombucha on the regular. Here’s his breakdown:
Last Saturday I attended the Orchard Hill Farm Spring Fair – what a great turn out! I was quite surprised at the interest in fermenting.
Let’s talk Kombucha! There is a lot of buzz around about this fermented tea drink and it’s now showing up everywhere. Kombucha comes from fermenting various types of tea in sugar water with the use of a SCOBY. ‘SCOBY’ stands for Symbiotic Colony Of Bacteria and Yeast and has been around for years…but let’s not get too into the history of it – there’s lot of easy-to-find information on the internet.
This is the process that I’ve been using for several years now:
Kombucha
3 quarts water
1 cup sugar
4 tea bags (4 black, or 2 black and 2 green, or 2 black and 2 ginger)
1 Scoby
1/2 to 1 cup starter (Kombucha from previous batch)
Bring the water to a boil then add the cup of sugar.
Once the sugar has dissolved, add the 4 tea bags and let it boil for 5 minutes.
Remove the tea bags and allow the sweet tea to cool to room temperature.
Place the room temperature sweet tea into a glass container for the fermenting process.
Add the starter and Scoby.
Cover with a cloth to keep anything out of the brew and allow the Scoby to breathe.
Place the container somewhere warm (65-85F) and out of direct sunlight.
At the 8-day mark you can taste the Kombucha to see if it is still sweet. If you are happy with the taste you can process it and if it’s too sweet just let it ferment longer (if you let it go too long it will get very tart).
I process the Kombucha by removing the Scobys (there will be two now) and half to 1 cup of the kombucha to be used as my next starter.
Filter the kombucha through a cloth and place in the refrigerator.
If you want to do a second fermentation, add some fruit juice, fruit, herbs, or ginger and put a secure lid on. Set on counter for a day or two (be careful when you open it as there will be a gas build up). Enjoy!
There is a lot of information on the benefits and adverse effects of drinking Kombucha. Take the time to do your research to make sure this is something you want to do.
– Jim Conrad
Fermentation & Recipes
 The Spring Fair was wonderful! Thanks all who came out. Here is a little something about fermentation and a few recipes to go with the demonstration today.
I lived on the West Coast for over a decade, so of course I’ve heard of the benefits of naturally fermented vegetables – it’s like a right of passage – you have your first European style cappuccino, and then a tempeh reuben with sauerkraut that was made in the sandwich guy’s basement. And I always thought that I should be fermenting vegetables, but aside from a few batches of pickles, and some fermenting at the restaurant I worked at, I didn’t do much at home. Until now! Now I’m at the farm, surrounded by all these vegetables…and it seems like every other week there’s another study out, linking our gut health with a healthy immune system, mental health or digestive prowess. Fermenting increases the availability of vitamins and aids in digestion. There’s a reason that almost every culture on the planet has some version of fermented food as a traditional food staple – think yogurt, sauerkraut, kimchee, kefir, miso…
I won’t go into much more detail – y’all can look it up on your own, or you’re like me and you already know that you should be eating more fermented foods, but they’re too expensive or they seem too daunting. But it’s so easy and fun. I love pickles, but the standard pickles are just vinegar and salt and cooked vegetables and they’re doing nothing for you. So I’ve got a recipe here for Garlicky Dill Carrots that are crunchy, salty and perfect with a sandwich. But I also think it’s really convenient to have something in the fridge that’s a little bit like a pickle and a little bit like a salad. I’ve been known to throw together the Curried Kraut with some celery, leafy greens and some tuna…et voila – hippy Nicoise! Enjoy. And bring me some of your fermented creations to try – that’s the thing, once you make a good one, you’re hooked and you can’t wait to share them.
Fermentation ‘Recipe’
I always thought that it was annoying that all these fermentation people didn’t just have a good recipe – it was always so loose-y goose-y it seemed like a joke. And now here I am, trying to write a recipe – but the thing is that it’s hard because there are sooo many things you can do, as long as you work within the basic rules. Don’t worry – there are recipes below!
The basic premise with lacto-fermentation is that you’re creating the perfect environment for only the bacteria that you’re interested in – not the mold, not the nasties, just the lactobacilli (that’s why it’s called lacto-fermentation, nothing to do with milk, just the particular family of bacteria). As the sugars in the vegetables are broken down by the bacteria into lactic acid, the taste becomes less sweet, and more tart – hence the vinegar-esque flavor. The longer the ferment, the more tart it will be – because of the increase in lactic acid. The texture of the vegetables will also be affected – if it’s too long, they will get mushy. Around 2 weeks is good for most of the vegetables that I’ve used. The flavor is more developed and the vegetables are still crisp.
Here are the rules:
- Keep oxygen out (anaerobic fermentation) – some may argue that this is not necessary, but it makes it a lot easier and takes the guess work out of it. So use an airlock or a crock with a water moat (google it!). Harvest Pantry – upstairs at the Western Fair Market in London – sells some lovely, simple gallon jars with an airlock that are perfect for about $16. Keep in mind that every time you open your fermentation jar, you’re allowing oxygen in. Not a big deal if you do it once at the 10 day mark, but you don’t want to open it every day.
- Salt – the less salt you use, the greater the chance that another bacteria is going to take up residence, and it also helps to create the pickle/kraut flavor and texture. Too much and it’s inedible. Use a nice sea salt, not factory salt. Himalayan pink salt, Real Salt, or grey salt are all great. Not Kosher salt, not shaker salt.
- Keep it long sleeve t-shirt temperature – most of the time, a cool room temperature is good for fermenting – around 68˚F. A little warmer makes things happen faster, a little cooler makes things take a little bit longer.
- Basic cleanliness – wash your hands, wash your fermenting things, keep clean cutting boards clean, don’t get any meat/dairy juices in there, etc.
- Use good water if you’re making a brine (i.e. not chlorinated water). At the farm we have well water, which is great. If you live in the city, use bottled water.
- Good vegetables! I almost forgot this one because it’s a given, right? Organic, local, fresh.
- Keep it in the dark(ish). It doesn’t have to be a blackout, but keeping it in a cupboard or wrapped in a towel is a good idea.
- Keep the vegetables submerged in your liquid. Use a plate, boiled rocks, or a clean mason jar to keep the veggies submerged. Cabbage leaves are really handy for this too – use the big ones from the outside of the head to wrap around the surface and push the veg beneath the liquid.
Some people think that a little mold on the top is no big deal, but I say no! Aim higher! Who wants mold in their food? Unless it’s cheese, of course. I don’t like mold – I feel like most of the time, you can taste it, and if you have a proper set up (air-lock, good vegetables, good salt, etc), there really is no reason that it should become moldy. Cloudiness, and a sort of a white, silty look is normal and desirable. Any mold, sliminess or discoloration is a chance to start again!
Garlicky Dill Carrots
8 cups water
4 Tablespoons sea salt
3-5 cloves garlic, peeled and cut in half
2 medium hand-sized dill fronds
around 4 lbs carrots, peeled and cut into sticks
Place the dill fronds and garlic in the bottom of the fermentation jar. Layer (or toss) the carrot sticks in on top. If you get strategic at the top, you might be able to layer them so that they won’t float when you add the brine.
Dissolve the salt in the water by putting them in a bowl and stirring, or whisking. If you’re using a salt that it is tough to dissolve (large chunks, etc), throw it in the blender on low while you’re prepping the rest of the vegetables.
Pour the brine over the carrots until it covers them by 2”. You will probably have some left over brine, which can be saved in the fridge for your next fermentation project. Use a small plate, clean, boiled rocks, or a clean pint sized mason jar to weigh down the carrots in the brine.
Put on the lid, and put the jar in a dark corner (a cupboard, behind a book shelf, etc). Wrap it in a towel and make a note to check it in a week. After a week, don’t open it, but check that the vegetables are submerged and that it there isn’t any mold or weirdness. Taste it at the 2 week mark (or 10 days if you’re antsy).
Harvest your ferment by moving it into smaller, labelled jars to put in the fridge. Use long tongs and a wide mouth funnel to move the vegetables into mason jars. Remove the dill and garlic as you come across them.
Curried Kraut
4 cups water (non-chlorinated, room temperature)
2 Tablespoons sea salt
1-2 small shallots, sliced thinly (or 3 cloves garlic)
3 small thumb sized pieces of ginger, peeled
3 Tablespoons mild curry powder
1 jalepeno or serrano pepper, de-seeded & minced (optional)
12 cups shredded vegetables:
2-3 medium golden beets, peeled and grated
8 medium carrots, peeled and grated
½ cabbage, shredded
1 head cauliflower, cut into small florets (use the stalk too!)
other ideas:
1-2 small green or red meat radish
2 small kohlrabi (or, like an 1/8 of the giant storage kohlrabi)
1 rutabaga
5 small hakurei turnip
- A note on the vegetables – it doesn’t really matter what vegetables you use (see note below in the FAQs section), but using a range of different colours is nice, and the more cruciferous vegetables (kohlrabi, cabbage, cauliflower), the more stinky it will be – stinky in a good way ;).
If you’re using a cabbage – save 4-5 outer leaves for wrapping before cutting it up. Grate or cut up the vegetables – on a box grater, with a mandolin, or with the grating attachment of a food processor. I usually use a combination – I generally hand slice the cabbage, shallot and cauliflower, and use the food processor to grate all the root vegetables. In a large bowl, toss together the vegetables to mix them well and sprinkle on the curry powder.
Dissolve the salt in the water by putting them in a bowl and stirring, or whisking. If you’re using a salt that it is tough to dissolve (large chunks, etc), throw it in the blender on low while you’re prepping the rest of the vegetables.
Pack the vegetables into your fermentation jar. Press on it to compress it. Use some of the large cabbage leaves to layer on the top of the grated vegetables to help keep them submerged below the surface of the brine. Pour the brine over until it comes 2“ above the surface of the veg.
Use a small plate, clean boiled rocks, or a clean pint sized mason jar to weigh down the vegetables in the brine.
Put on the lid, and put the jar in a dark corner (a cupboard, behind a book shelf, etc). Wrap it in a towel and make a note to check it in a week. After a week, don’t open it, but check that the vegetables are submerged and that it there isn’t any mold or weirdness. Taste it at the 2 week mark (or 10 days if you’re antsy).
Harvest your ferment by moving it into smaller, labelled jars to put in the fridge. Use long tongs and a wide mouth funnel to move the vegetables into mason jars. Remove the big chunks of ginger as you find them. Or don’t worry about it and watch your friends find them as they chew them!
Beet Kraut with Lime and Ginger
½ tsp lime zest
4 – 1 inch chunks of ginger, peeled
10 Cups beets, peeled and shredded (around 6 medium)
1 ½ Tablespoons sea salt
1 Cup brine (same brine as above – or 1 Cup water to 1 ½ tsp salt)
Toss the grated beets with the zest, ginger and salt. Pack it into your fermentation jar, and top with brine to bring the brine 2” above the beets. Use boiled, clean rocks to weigh down the grated beets. A few will float to the top, skim off some if there are a lot, but if you’re using an airlock, it will probably be ok. Taste it after a week (the ferment we tasted today at the demonstration was a week old), but keep it going for a little longer if you’d like.
FAQs
What vegetables are good for fermenting?
Most of them. Texture is the only hiccup. If you’re going to ferment leafy greens or eggplant, you’d have to have a pretty high tolerance for soft, mushy savory things! But carrot, cabbage, any kind of radish, turnip, snap peas, asparagus, green beans, kohlrabi, celery root, beets, onions, garlic, shallot…all delicious.
How long is it good for?
Once you taste the ferment and decide it’s where you’d like it, throw it in the fridge and munch away til it’s gone. After a couple of months, the texture might start to degrade a bit. But if it’s a good one, I’ll bet you eat it before it’s gone. It’s a great way to use up some of those extra vegetables in your fridge and keep them around for another month or two.
Can I ferment a smaller quantity? Why are your recipes so big?
The path to success is paved with gallon jars. The bigger the jar, the more consistent the results. Sure, you could go to the trouble of making a quart of something. But then you sit it in your cupboard for 2 weeks, and it could be gone in a week. Make a little bit more and give it away to your friends!