Tag: work horse
First Pick Up This Week!
FIRST PICK UP DAYS – TUESDAY, May 17th or SATURDAY, May 21st 11am-7pm
First Pick Up this week – if you haven’t received an email from us, give us a shout to make sure that you’re on the mailing list!
We’ve got asparagus coming out our ears and the rhubarb is looking bushy – it must be time to start the CSA! We are looking forward to seeing you all. We still have a handful of spots left, so if you have any friends or colleagues that are interested in joining, please encourage them – now is the time! We are also offering a limited number of half share options (pick up every 2 weeks).
If you’re new, this is how it works:
- You can come on your pick up day (Tuesday or Saturday) any time 11am-7pm
- Cross off your name on the list of members
- Pack up your share (bring your own bags/basket/box)
- If you can’t make it, please let us know and we can put aside your share in the white cooler – it will be in a box with your name on it to pick up the next day.
- Remember – there will be more and more produce as the season progresses!
- Bring some cash if you’d like to buy eggs ($6/doz)
- If you have a working share, there will be a calendar to sign up for dates to come out to the farm – they are usually 2.5 hour blocks of time, so you will sign up for 2 different days for the season.
- If you haven’t paid, please bring payment (in full or post-dated checks) with you to the first pick-up.
- Caesar (a slightly tubby Golden Retriever) may greet you with a tail wag or a bark – he’s very friendly. Don’t leave out any tasty treats (i.e. bread) for him, though, because he’ll take advantage!
For our first pick-up, we are anticipating salad greens, pok choi, spinach, rhubarb, asparagus, and herbs. Seth will be sending an email about bread for this year shortly.
The Spring Fair was a wonderful experiment – if you attended, thanks for coming and please let us know your ideas for how to do it better next year, or what to keep! Maybe an industrial-sized popcorn maker next year ;). It was a beautiful day.
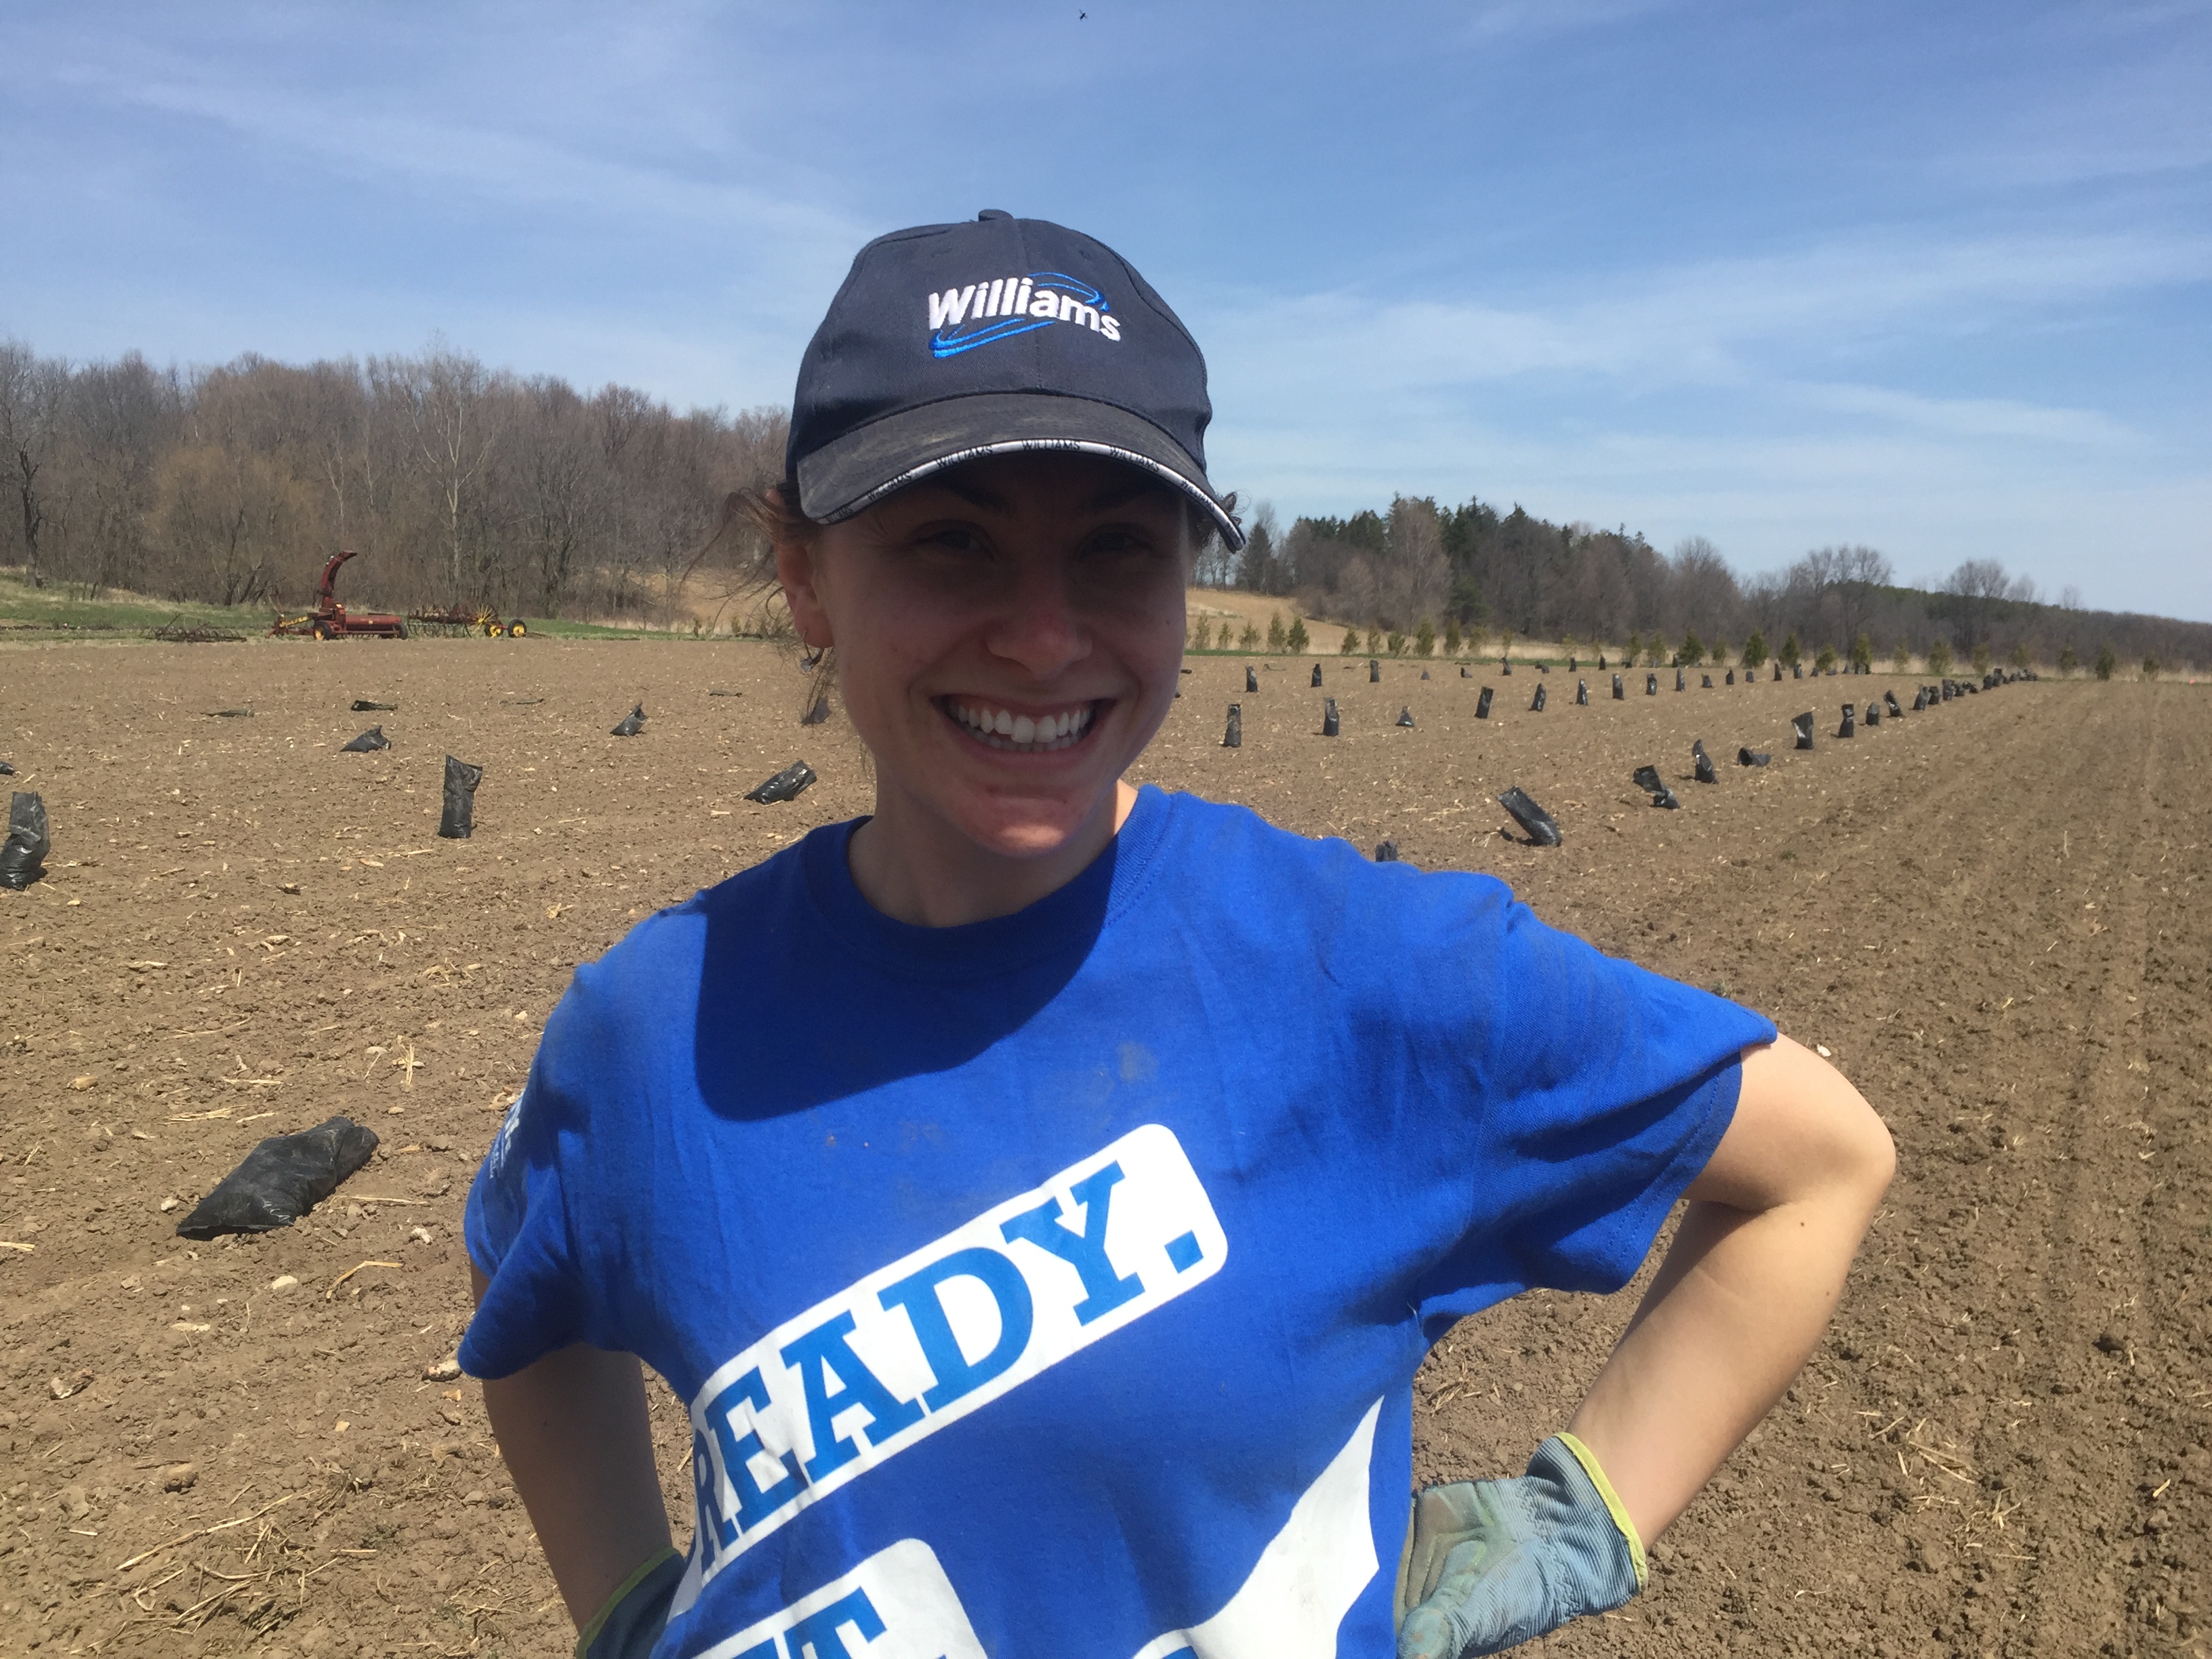
We have been busy planting (and planting and planting), assembling hoophouses and organizing our pastures. We just got 200 new trees to plant from Kettlecreek Conservation Authority (red oak, sycamore, sugar maple and white spruce) and will have to plant them this week…what were we thinking?!
See you soon!
First Pick Up, Meet the Interns & Kombucha
FIRST PICK UP DAYS – TUESDAY, May 17th or SATURDAY, May 21st 11am-7pm
The Spring Fair was a wonderful experiment – if you attended, thanks for coming and please let us know your ideas for how to do it better next year, or what to keep! Maybe an industrial-sized popcorn maker next year ;).
Meet the Interns
There are five-ish (do you not count the childcarer or count the children?) interns this year, and you may have started to get to know them if you follow us on Facebook or Instagram (orchardhillfarmca).

Ellen & Aaron – Ellen is Ken & Martha’s daughter, and she and her family moved back to the farm this year. Aaron loves to work outside and has a lot of construction experience, as well as in accounting and clean energy finance. He grew up in Wisconsin and all of his family lives there still. Ellen grew up on the farm and started the CSA with Martha way back when. Since then, she has worked in coffee and fine dining and loves to cook and share her love of food – look forward to lots of cooking tips and recipes this year! Della will soon be 4 and Frannie is almost 6 months old.
Kelsey – grew up in Tillsonburg and just graduated from Western with a degree in Anthropology. She loves gardening, cross country running and baking. She rode horses when she was younger and used to work on a lavender farm.
Bryan – comes to us via Pickering and Parry Sound. He

loves animals and the outdoors – ask him about bird songs, or toads! He started an electrician apprenticeship, and has worked a lot of conservation jobs. Last year he worked at a farm that we know well – Meeting Place Organic Farm – and worked with draft horses there. In the fall he’ll be starting his study of Heritage Masonry at Algonquin College.
Heidi – grew up in Toronto, but looked forward to long weekends when her family would leave the city and visit her grandparents at their family farm. She graduated from Lakehead University and spent 4 years gardening and working on Cortes Island in British Columbia. For the past several years she has been doing strawbale construction and carpentry. She’s excited to get back to farming!
Kombucha Tutorial

Jim Conrad is an all around handy guy – he’s been helping us out on the farm with all kinds of menial and skilled tasks (metal working, small machines, window installation, painting, picking, planting) for a while now – a friend and a member of the garden. At home he’s equally as handy, and makes kombucha on the regular. Here’s his breakdown:
Last Saturday I attended the Orchard Hill Farm Spring Fair – what a great turn out! I was quite surprised at the interest in fermenting.
Let’s talk Kombucha! There is a lot of buzz around about this fermented tea drink and it’s now showing up everywhere. Kombucha comes from fermenting various types of tea in sugar water with the use of a SCOBY. ‘SCOBY’ stands for Symbiotic Colony Of Bacteria and Yeast and has been around for years…but let’s not get too into the history of it – there’s lot of easy-to-find information on the internet.
This is the process that I’ve been using for several years now:
Kombucha
3 quarts water
1 cup sugar
4 tea bags (4 black, or 2 black and 2 green, or 2 black and 2 ginger)
1 Scoby
1/2 to 1 cup starter (Kombucha from previous batch)
Bring the water to a boil then add the cup of sugar.
Once the sugar has dissolved, add the 4 tea bags and let it boil for 5 minutes.
Remove the tea bags and allow the sweet tea to cool to room temperature.
Place the room temperature sweet tea into a glass container for the fermenting process.
Add the starter and Scoby.
Cover with a cloth to keep anything out of the brew and allow the Scoby to breathe.
Place the container somewhere warm (65-85F) and out of direct sunlight.
At the 8-day mark you can taste the Kombucha to see if it is still sweet. If you are happy with the taste you can process it and if it’s too sweet just let it ferment longer (if you let it go too long it will get very tart).
I process the Kombucha by removing the Scobys (there will be two now) and half to 1 cup of the kombucha to be used as my next starter.
Filter the kombucha through a cloth and place in the refrigerator.
If you want to do a second fermentation, add some fruit juice, fruit, herbs, or ginger and put a secure lid on. Set on counter for a day or two (be careful when you open it as there will be a gas build up). Enjoy!
There is a lot of information on the benefits and adverse effects of drinking Kombucha. Take the time to do your research to make sure this is something you want to do.
– Jim Conrad
Fermentation & Recipes
 The Spring Fair was wonderful! Thanks all who came out. Here is a little something about fermentation and a few recipes to go with the demonstration today.
I lived on the West Coast for over a decade, so of course I’ve heard of the benefits of naturally fermented vegetables – it’s like a right of passage – you have your first European style cappuccino, and then a tempeh reuben with sauerkraut that was made in the sandwich guy’s basement. And I always thought that I should be fermenting vegetables, but aside from a few batches of pickles, and some fermenting at the restaurant I worked at, I didn’t do much at home. Until now! Now I’m at the farm, surrounded by all these vegetables…and it seems like every other week there’s another study out, linking our gut health with a healthy immune system, mental health or digestive prowess. Fermenting increases the availability of vitamins and aids in digestion. There’s a reason that almost every culture on the planet has some version of fermented food as a traditional food staple – think yogurt, sauerkraut, kimchee, kefir, miso…
I won’t go into much more detail – y’all can look it up on your own, or you’re like me and you already know that you should be eating more fermented foods, but they’re too expensive or they seem too daunting. But it’s so easy and fun. I love pickles, but the standard pickles are just vinegar and salt and cooked vegetables and they’re doing nothing for you. So I’ve got a recipe here for Garlicky Dill Carrots that are crunchy, salty and perfect with a sandwich. But I also think it’s really convenient to have something in the fridge that’s a little bit like a pickle and a little bit like a salad. I’ve been known to throw together the Curried Kraut with some celery, leafy greens and some tuna…et voila – hippy Nicoise! Enjoy. And bring me some of your fermented creations to try – that’s the thing, once you make a good one, you’re hooked and you can’t wait to share them.
Fermentation ‘Recipe’
I always thought that it was annoying that all these fermentation people didn’t just have a good recipe – it was always so loose-y goose-y it seemed like a joke. And now here I am, trying to write a recipe – but the thing is that it’s hard because there are sooo many things you can do, as long as you work within the basic rules. Don’t worry – there are recipes below!
The basic premise with lacto-fermentation is that you’re creating the perfect environment for only the bacteria that you’re interested in – not the mold, not the nasties, just the lactobacilli (that’s why it’s called lacto-fermentation, nothing to do with milk, just the particular family of bacteria). As the sugars in the vegetables are broken down by the bacteria into lactic acid, the taste becomes less sweet, and more tart – hence the vinegar-esque flavor. The longer the ferment, the more tart it will be – because of the increase in lactic acid. The texture of the vegetables will also be affected – if it’s too long, they will get mushy. Around 2 weeks is good for most of the vegetables that I’ve used. The flavor is more developed and the vegetables are still crisp.
Here are the rules:
- Keep oxygen out (anaerobic fermentation) – some may argue that this is not necessary, but it makes it a lot easier and takes the guess work out of it. So use an airlock or a crock with a water moat (google it!). Harvest Pantry – upstairs at the Western Fair Market in London – sells some lovely, simple gallon jars with an airlock that are perfect for about $16. Keep in mind that every time you open your fermentation jar, you’re allowing oxygen in. Not a big deal if you do it once at the 10 day mark, but you don’t want to open it every day.
- Salt – the less salt you use, the greater the chance that another bacteria is going to take up residence, and it also helps to create the pickle/kraut flavor and texture. Too much and it’s inedible. Use a nice sea salt, not factory salt. Himalayan pink salt, Real Salt, or grey salt are all great. Not Kosher salt, not shaker salt.
- Keep it long sleeve t-shirt temperature – most of the time, a cool room temperature is good for fermenting – around 68˚F. A little warmer makes things happen faster, a little cooler makes things take a little bit longer.
- Basic cleanliness – wash your hands, wash your fermenting things, keep clean cutting boards clean, don’t get any meat/dairy juices in there, etc.
- Use good water if you’re making a brine (i.e. not chlorinated water). At the farm we have well water, which is great. If you live in the city, use bottled water.
- Good vegetables! I almost forgot this one because it’s a given, right? Organic, local, fresh.
- Keep it in the dark(ish). It doesn’t have to be a blackout, but keeping it in a cupboard or wrapped in a towel is a good idea.
- Keep the vegetables submerged in your liquid. Use a plate, boiled rocks, or a clean mason jar to keep the veggies submerged. Cabbage leaves are really handy for this too – use the big ones from the outside of the head to wrap around the surface and push the veg beneath the liquid.
Some people think that a little mold on the top is no big deal, but I say no! Aim higher! Who wants mold in their food? Unless it’s cheese, of course. I don’t like mold – I feel like most of the time, you can taste it, and if you have a proper set up (air-lock, good vegetables, good salt, etc), there really is no reason that it should become moldy. Cloudiness, and a sort of a white, silty look is normal and desirable. Any mold, sliminess or discoloration is a chance to start again!
Garlicky Dill Carrots
8 cups water
4 Tablespoons sea salt
3-5 cloves garlic, peeled and cut in half
2 medium hand-sized dill fronds
around 4 lbs carrots, peeled and cut into sticks
Place the dill fronds and garlic in the bottom of the fermentation jar. Layer (or toss) the carrot sticks in on top. If you get strategic at the top, you might be able to layer them so that they won’t float when you add the brine.
Dissolve the salt in the water by putting them in a bowl and stirring, or whisking. If you’re using a salt that it is tough to dissolve (large chunks, etc), throw it in the blender on low while you’re prepping the rest of the vegetables.
Pour the brine over the carrots until it covers them by 2”. You will probably have some left over brine, which can be saved in the fridge for your next fermentation project. Use a small plate, clean, boiled rocks, or a clean pint sized mason jar to weigh down the carrots in the brine.
Put on the lid, and put the jar in a dark corner (a cupboard, behind a book shelf, etc). Wrap it in a towel and make a note to check it in a week. After a week, don’t open it, but check that the vegetables are submerged and that it there isn’t any mold or weirdness. Taste it at the 2 week mark (or 10 days if you’re antsy).
Harvest your ferment by moving it into smaller, labelled jars to put in the fridge. Use long tongs and a wide mouth funnel to move the vegetables into mason jars. Remove the dill and garlic as you come across them.
Curried Kraut
4 cups water (non-chlorinated, room temperature)
2 Tablespoons sea salt
1-2 small shallots, sliced thinly (or 3 cloves garlic)
3 small thumb sized pieces of ginger, peeled
3 Tablespoons mild curry powder
1 jalepeno or serrano pepper, de-seeded & minced (optional)
12 cups shredded vegetables:
2-3 medium golden beets, peeled and grated
8 medium carrots, peeled and grated
½ cabbage, shredded
1 head cauliflower, cut into small florets (use the stalk too!)
other ideas:
1-2 small green or red meat radish
2 small kohlrabi (or, like an 1/8 of the giant storage kohlrabi)
1 rutabaga
5 small hakurei turnip
- A note on the vegetables – it doesn’t really matter what vegetables you use (see note below in the FAQs section), but using a range of different colours is nice, and the more cruciferous vegetables (kohlrabi, cabbage, cauliflower), the more stinky it will be – stinky in a good way ;).
If you’re using a cabbage – save 4-5 outer leaves for wrapping before cutting it up. Grate or cut up the vegetables – on a box grater, with a mandolin, or with the grating attachment of a food processor. I usually use a combination – I generally hand slice the cabbage, shallot and cauliflower, and use the food processor to grate all the root vegetables. In a large bowl, toss together the vegetables to mix them well and sprinkle on the curry powder.
Dissolve the salt in the water by putting them in a bowl and stirring, or whisking. If you’re using a salt that it is tough to dissolve (large chunks, etc), throw it in the blender on low while you’re prepping the rest of the vegetables.
Pack the vegetables into your fermentation jar. Press on it to compress it. Use some of the large cabbage leaves to layer on the top of the grated vegetables to help keep them submerged below the surface of the brine. Pour the brine over until it comes 2“ above the surface of the veg.
Use a small plate, clean boiled rocks, or a clean pint sized mason jar to weigh down the vegetables in the brine.
Put on the lid, and put the jar in a dark corner (a cupboard, behind a book shelf, etc). Wrap it in a towel and make a note to check it in a week. After a week, don’t open it, but check that the vegetables are submerged and that it there isn’t any mold or weirdness. Taste it at the 2 week mark (or 10 days if you’re antsy).
Harvest your ferment by moving it into smaller, labelled jars to put in the fridge. Use long tongs and a wide mouth funnel to move the vegetables into mason jars. Remove the big chunks of ginger as you find them. Or don’t worry about it and watch your friends find them as they chew them!
Beet Kraut with Lime and Ginger
½ tsp lime zest
4 – 1 inch chunks of ginger, peeled
10 Cups beets, peeled and shredded (around 6 medium)
1 ½ Tablespoons sea salt
1 Cup brine (same brine as above – or 1 Cup water to 1 ½ tsp salt)
Toss the grated beets with the zest, ginger and salt. Pack it into your fermentation jar, and top with brine to bring the brine 2” above the beets. Use boiled, clean rocks to weigh down the grated beets. A few will float to the top, skim off some if there are a lot, but if you’re using an airlock, it will probably be ok. Taste it after a week (the ferment we tasted today at the demonstration was a week old), but keep it going for a little longer if you’d like.
FAQs
What vegetables are good for fermenting?
Most of them. Texture is the only hiccup. If you’re going to ferment leafy greens or eggplant, you’d have to have a pretty high tolerance for soft, mushy savory things! But carrot, cabbage, any kind of radish, turnip, snap peas, asparagus, green beans, kohlrabi, celery root, beets, onions, garlic, shallot…all delicious.
How long is it good for?
Once you taste the ferment and decide it’s where you’d like it, throw it in the fridge and munch away til it’s gone. After a couple of months, the texture might start to degrade a bit. But if it’s a good one, I’ll bet you eat it before it’s gone. It’s a great way to use up some of those extra vegetables in your fridge and keep them around for another month or two.
Can I ferment a smaller quantity? Why are your recipes so big?
The path to success is paved with gallon jars. The bigger the jar, the more consistent the results. Sure, you could go to the trouble of making a quart of something. But then you sit it in your cupboard for 2 weeks, and it could be gone in a week. Make a little bit more and give it away to your friends!
April Flurries

The cats – Mosquito and Courgette – love greenhouse season because they get to lounge around on warm stones and pretend they’re indoor cats. They like to place themselves conveniently at petting level…but then they get kicked out for laying on top of the onions!
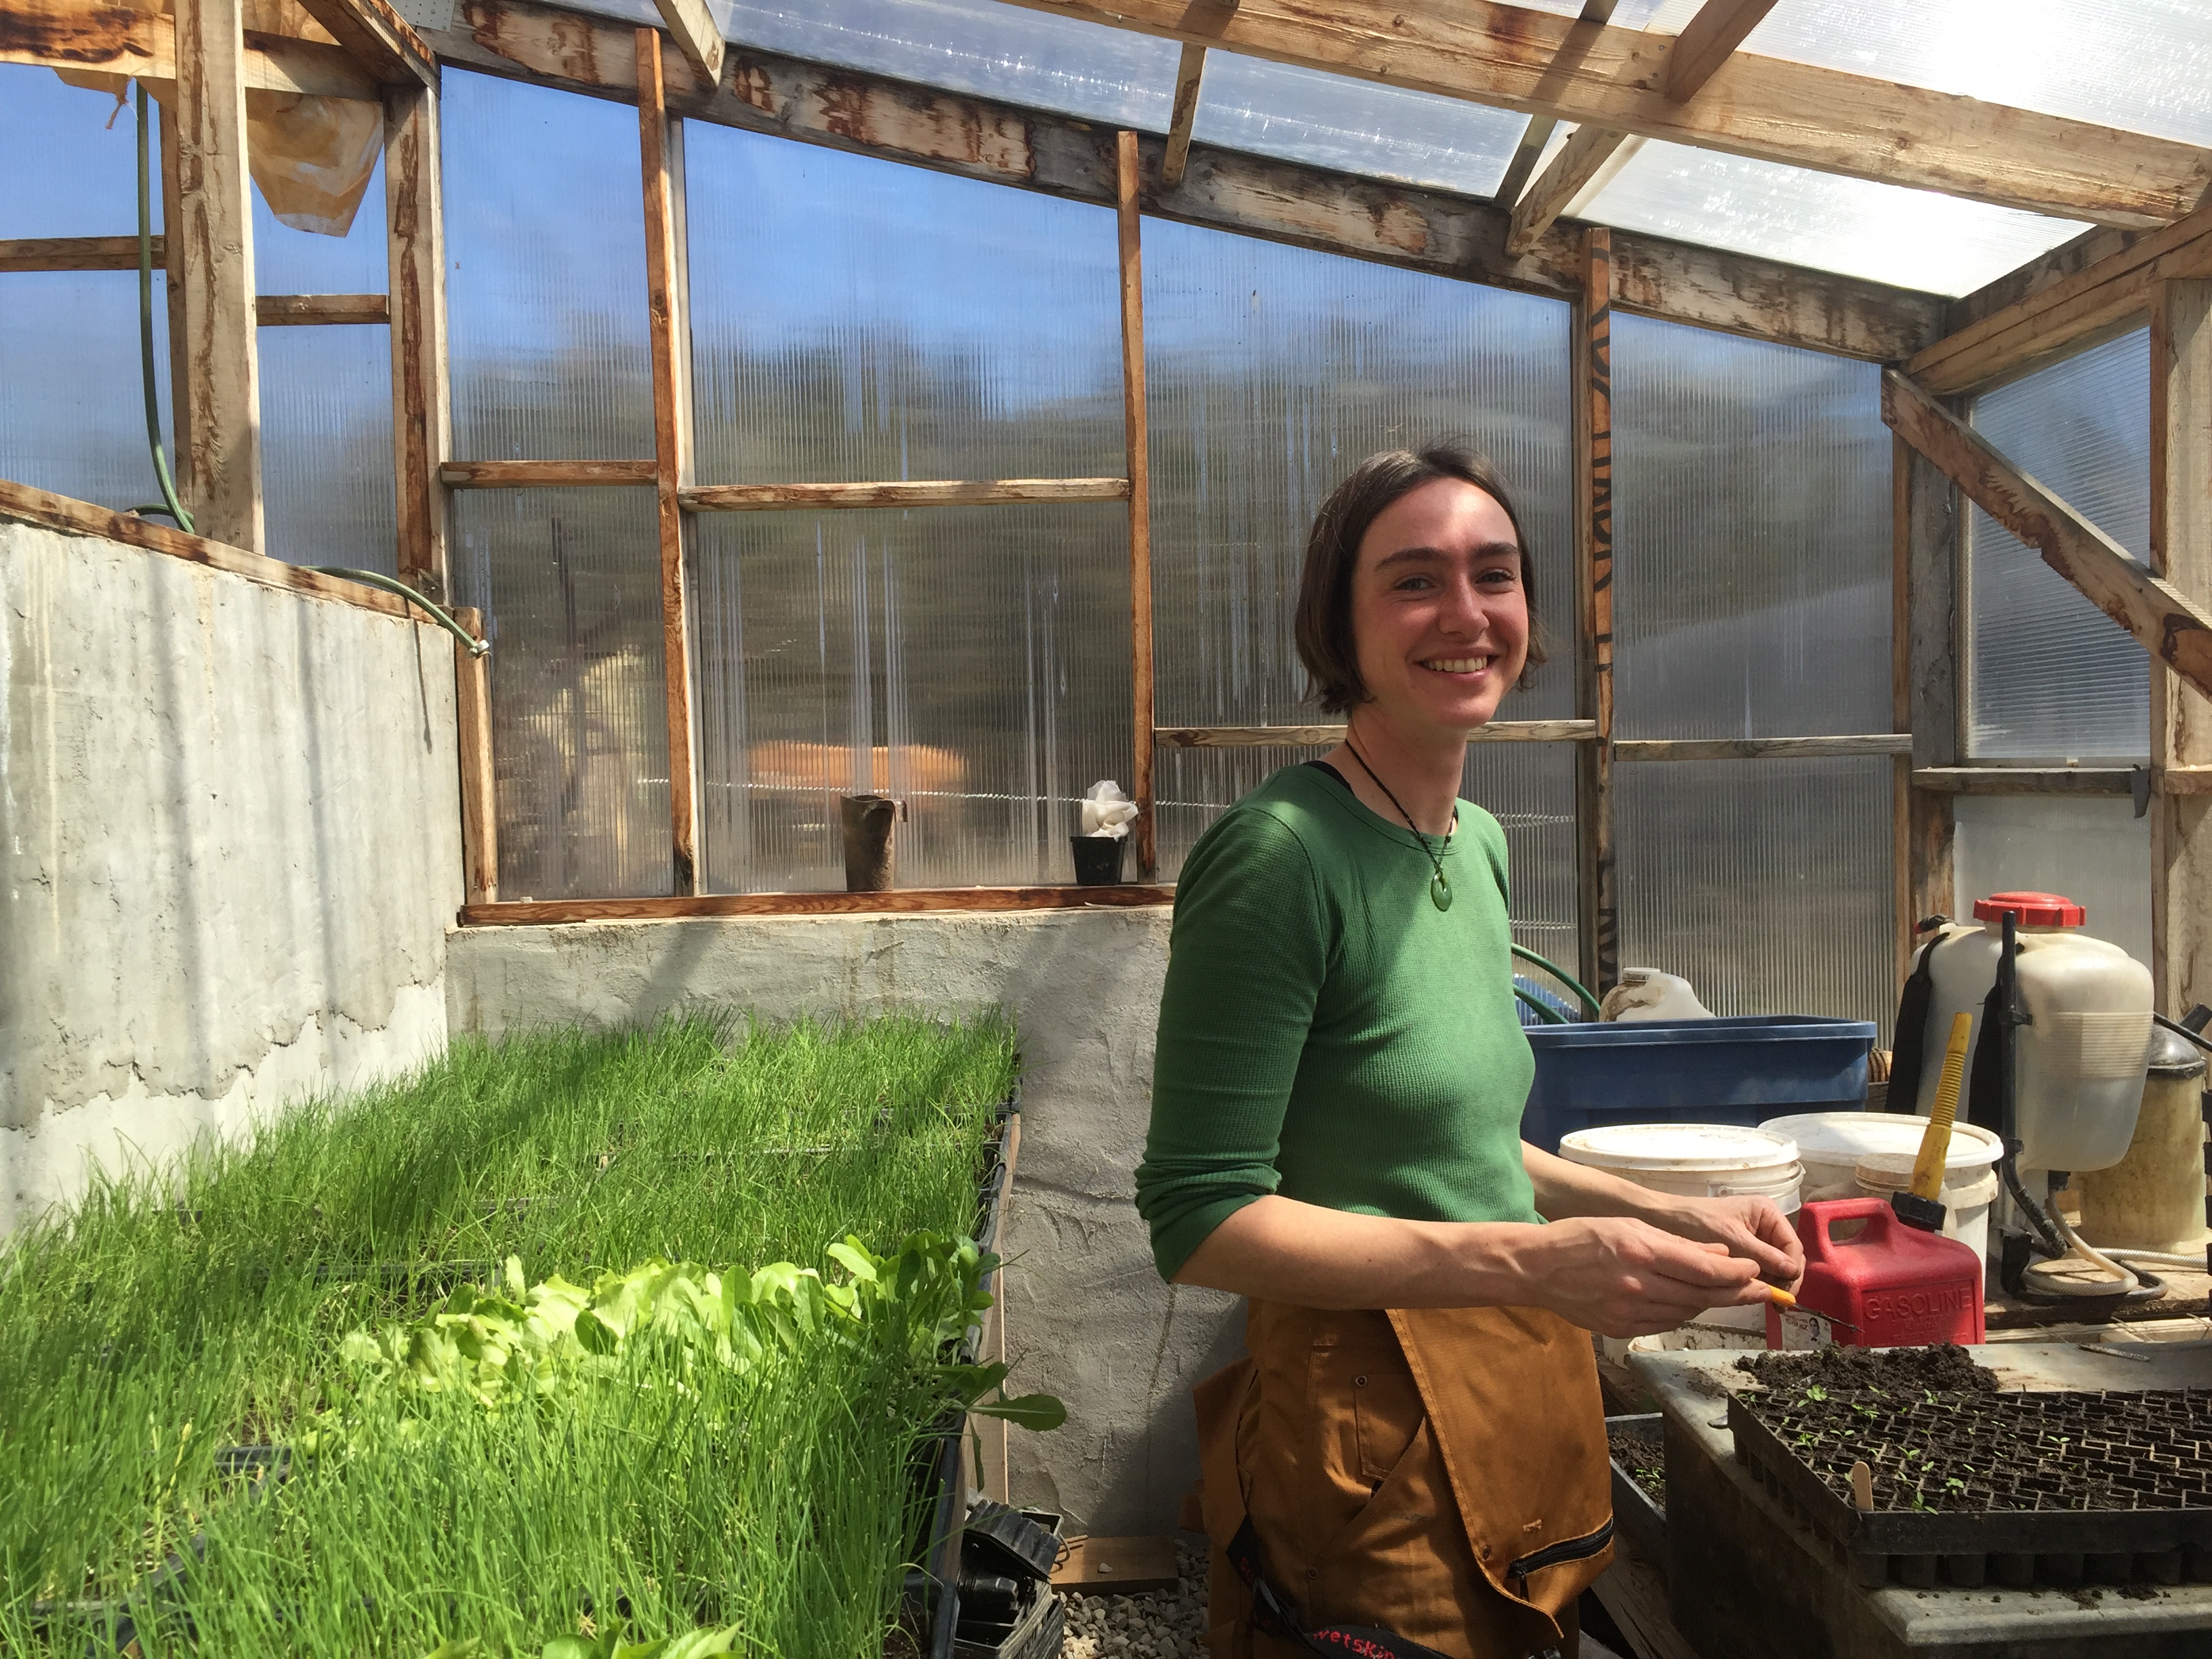
What looked like an early spring had us all excited to work the garden and plant…and now we’re back to a week of winter. But there’s still work to be done while it’s cold – last week two of the season’s three interns arrived – Bryan and Heidi. They had an introduction to working with the horses – although Bryan has quite a bit of experience, because last year he worked with draft horses at Meeting Place Farm, another organic vegetable & livestock farm near Lucknow. We have been planting in the greenhouse, and transplanted some pok choi into one of the hoophouses – protected with row cover too, but still – the poor pok choi!
We still have some shares available for the 2016 season, and we have lots of eggs in the cooler – the hens think it’s spring, even if it’s snowing.

This week we will be pruning the fruit trees and grapes, putting up a swing for Della (she picked out pink rope at the store with her dad), mulching the rhubarb – which is just starting to come up, and planting a bunch of seeds in the greenhouse. As well as stoking the fire to keep the little plants warm in this below freezing weather, and setting up the rest of the hoop houses for planting and transplanting.

Early Spring!

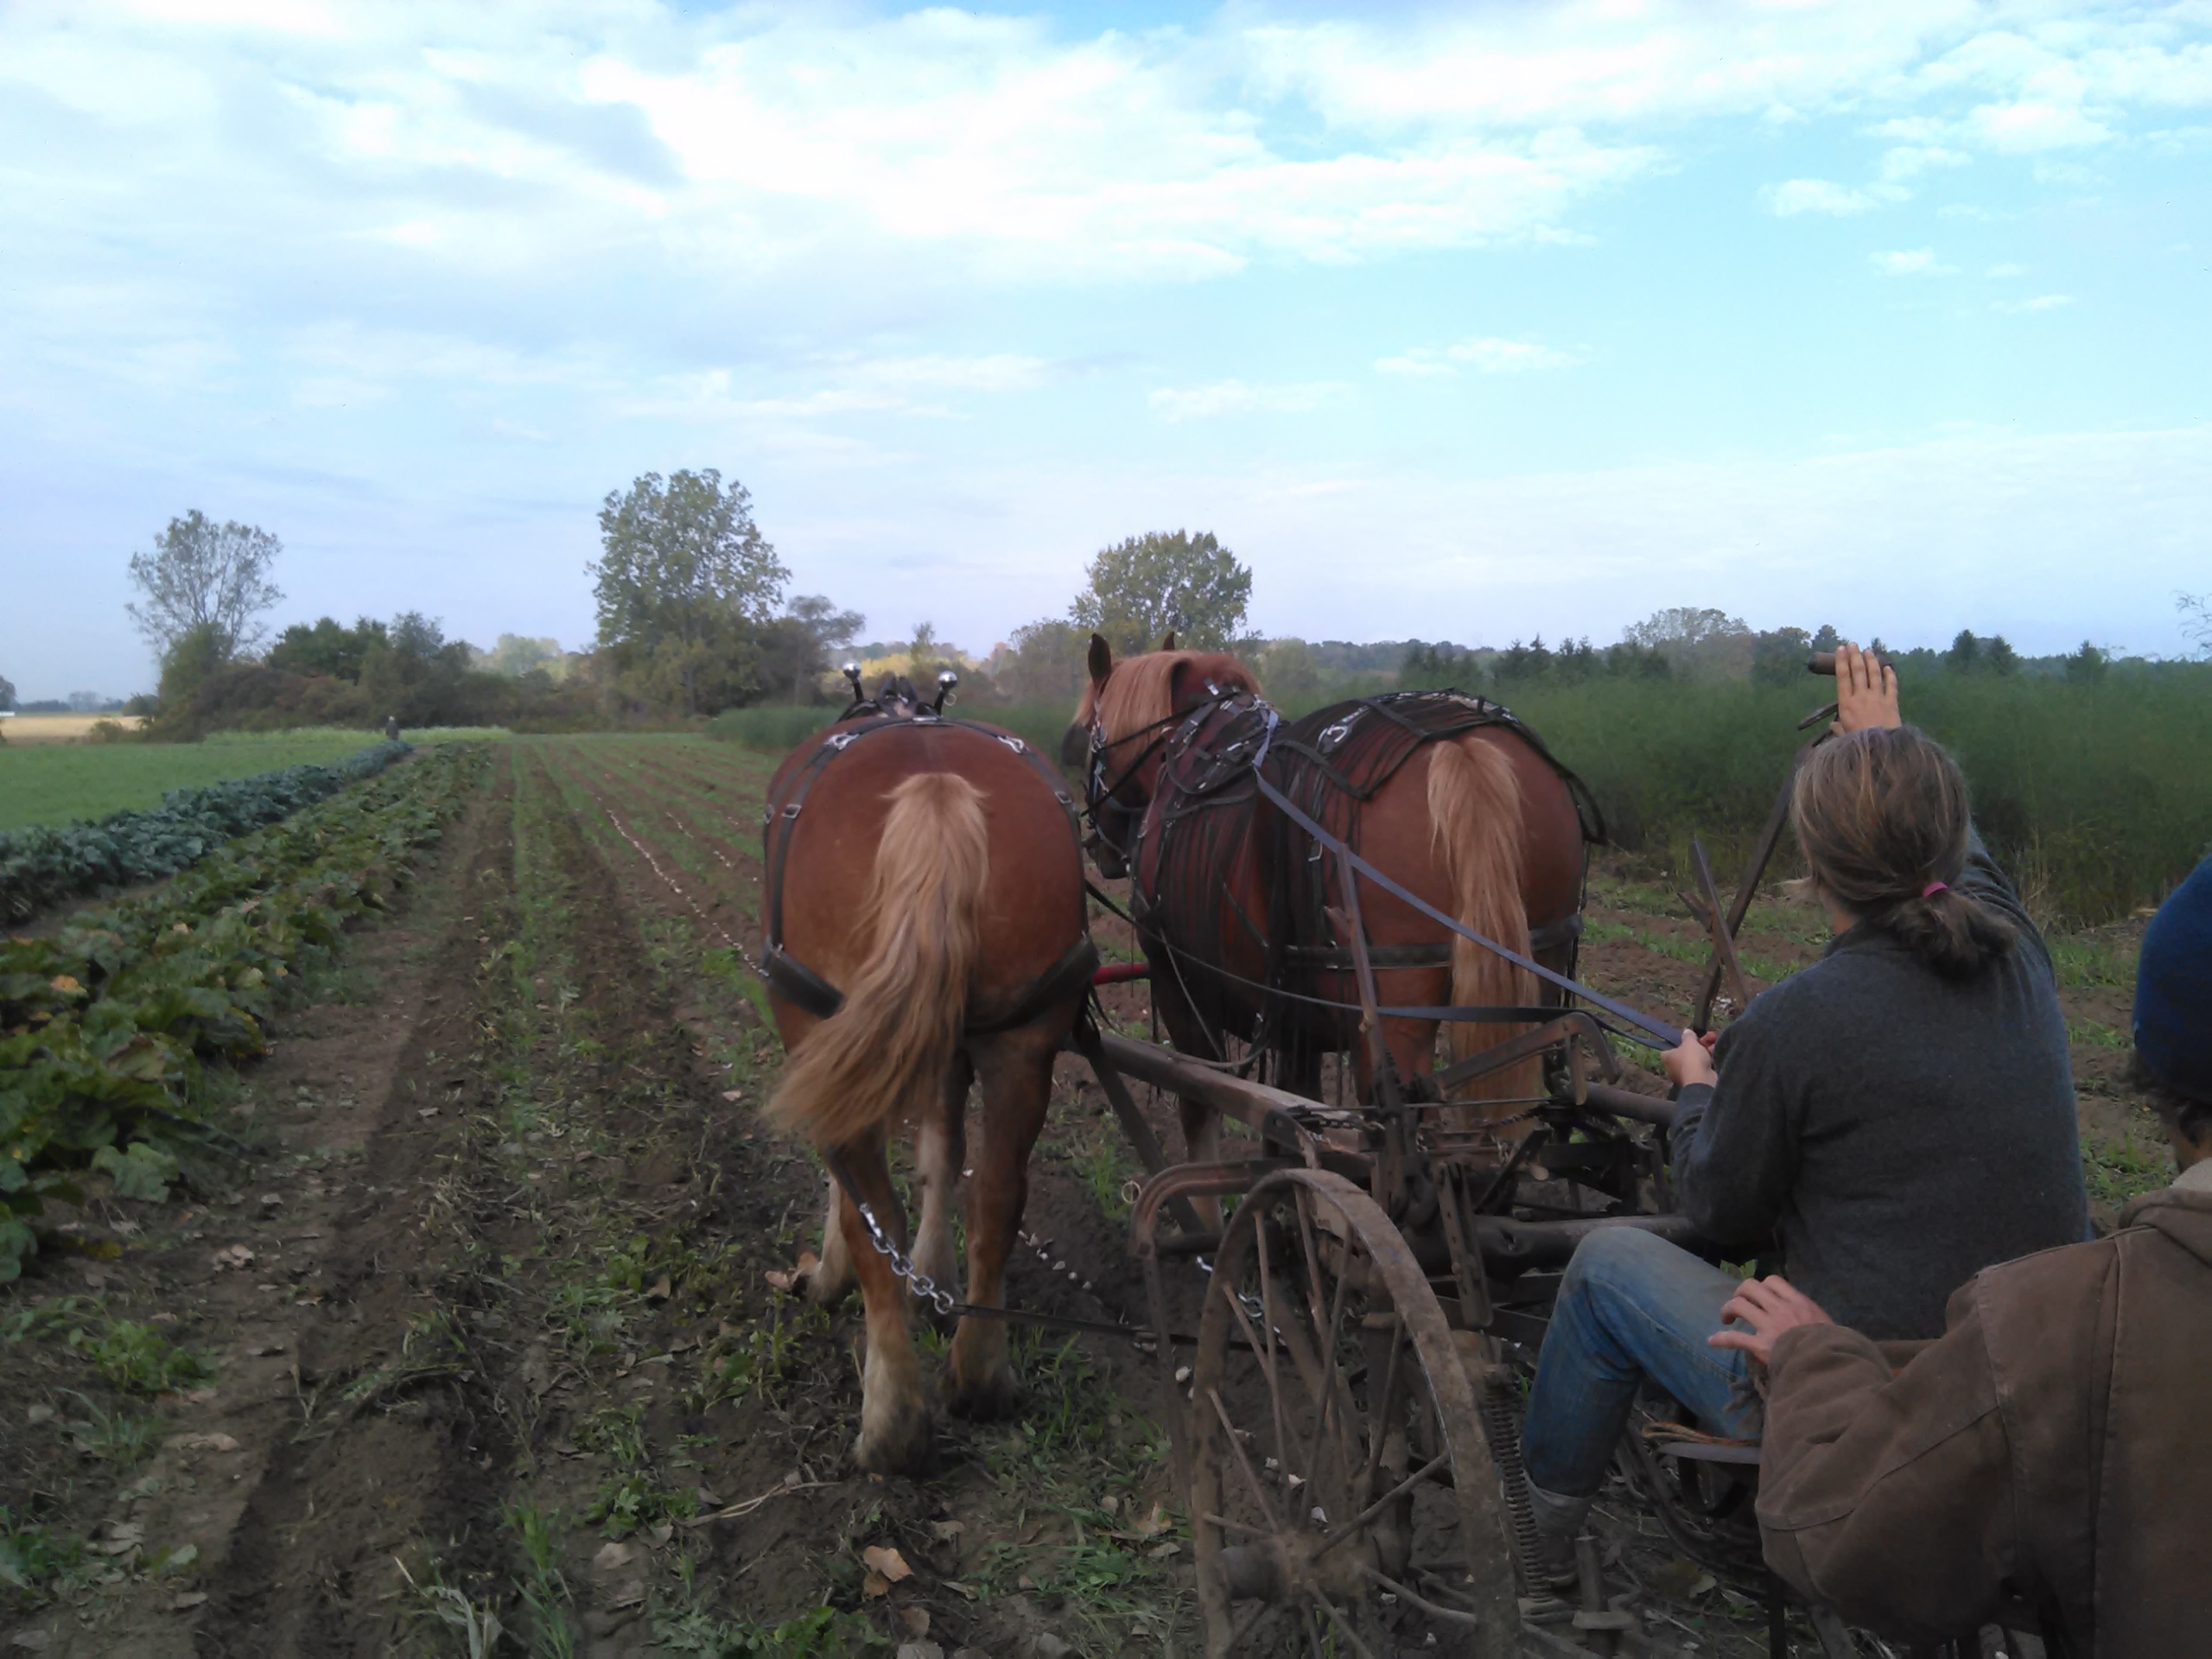
We are experiencing an early spring this year! However, we still need to wait for the land to dry out and there is rain in the forecast for next week. Ken has been itching to get starting on spring planting. He is trying to reduce the amount of ploughing and is more convinced than ever that cover crops and no-till are the way to go. Hauling out firewood and logs for sawing with the horses helps to get them into shape for spring work. This year Aaron helped with the logging and firewood hauling and began working with the draft horses at the same time. Our next winter firewood is ready for splitting and we have an increasing pile of lumber to mill. Hopefully we will be able to fit those jobs in around our spring work.
The greenhouse wood stove lit and little plants are springing up. It was fun to have four generations of my family seeding together when my mother showed up one afternoon for a visit. Having Della and Frances here certainly adds another dimension to activities around the farm.


Getting Ready for Spring


Snow Drops are starting to bloom – a sure sign that spring is on the way! We are ready to start up the greenhouse next week. What a difference from last year at this time when we still had many feet of snow. I love the surge of energy that I feel with the coming of spring and the longer day lengths. I am excited to start the new plants, always with the challenge of improving on the last season. Greenhouse work is such a joy, when we can get a jump on the season and feel the energy of the sun as it warms up the space. I look forward to working with my daughter, Ellen, again this year. We have come a long way from our first CSA season in 1997 when she and I started the CSA to make money for her to attend Trent University. I expect her three year old daughter, Della will be helping this year too. What fun that is for me!

The free range laying hens are truly free range in the winter because we take down their pasture fence to keep it from being damaged by a snow load. The hens are certainly enjoying the lack of snow this week and are scratching up everything they can looking for tasty morsels. I will have to restrict them soon or they will scratch too many roots on my blueberry plants.

Ken, Aaron and Seth have been starting the annual firewood work for heating the house, greenhouse and wood fired oven. Aaron has been learning to drive the Suffolk Punch Horses as he skids logs out of the woods.

New Year


We are off to a good start on the new year ahead. Our Daughter, Ellen, and her husband, Aaron, and two girls, Della – 3 1/2 years and Frances – 2 months are going to stay and work on the farm for the season. This is exciting for us as we plan ahead for the future. Ellen and Martha are busy mapping the CSA garden for next year and ordering seeds. Ken has had a lot of speaking engagements this year at various conferences and has given a variety of workshops on cover crops, no-till and soil health. Now he is getting ready for the Guelph Organic Conference where he will be selling his farm manufactured wheel hoes. He is also giving an Ecological Farmers Association of Ontario – Soils Workshop on the Friday of the weekend. We will also be having a booth on the lower level of the Conference to sell our wheelhoes and advertise our farm internships as well as our son, Grayden’s, One Day Draft Horse Workshops. Grayden is on a panel for a workshop on Saturday of the Conference – Reflections of Growing up on an Organic Farm. Aaron and Ellen will be attending workshops as well.
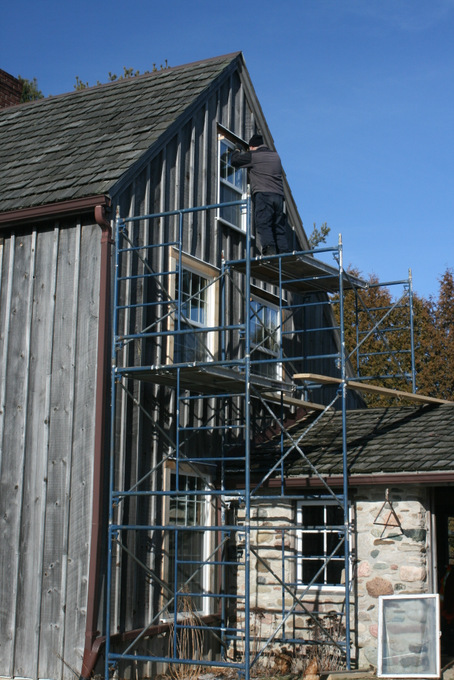
One of the jobs we were able to do this winter with the help of CSA member, Jim Conrad, was to replace the last six windows in our house. With the use of scaffolding the job went well and it is good to have that one off the list. The inside trim still needs to be installed and we are debating when that will actually happen with all the other demands that are starting to fill up our days…

In December a new Suffolk horse arrived. Sadie was born in May and will be a partner for, Flynn, our 2015 foal. She is a calm natured filly and hopefully they will become a good team in the future.
No-Till Garlic Planting & Pumpkin Honey Recipe


We have arrived at the last and 21st week of CSA pick-ups. After the last CSA pick-up our remaining interns will move on to other pursuits. We are very grateful for all their young energy and enthusiasm and wish them well with their future endeavours. One of the final jobs to tackle before our interns leave is the planting of garlic for the following year. For the past few years we have been no-till planting garlic into a cover crop of oats that will continue to grow into the fall and then winter kill. This year we added some daikon radish into the mix. The cover crop is a bit smaller because it was so dry in August/September, but we hope that it will have time to grow into the fall. To no-till plant the garlic, our draft horses open up a shallow trench with a riding cultivator and we drop in the cloves. Afterwards the riding cultivator closes in the the trench with discs and covers over the garlic. I realized when I was watching our granddaughter, Della, planting garlic that she is the eighth generation of my family to be working this land. I grew up listening to stories from my grandmother about how much she enjoyed farming here with horses. As I remember the story, after their children were grown my grandfather went to work for the railroad loading coal in Aylmer and my grandmother stayed home and farmed with a hired man. My Aunt Betty did all the cooking and my grandmother had the time of her life farming…My grandmother’s Haight ancestors cleared this land in the 1820’s.

I have heard about people planting ginger and growing it in hoop houses in the north and this year I decided to give it a try. In April when I bought the tubers to start in the greenhouse I also got some turmeric. Both grew fairly well and it was fun to dig up the plants and see what was there. I’m not sure about growing enough for the CSA, but I will enjoy using what I have grown this season.
All the fall grains and cover crops have come up well since the rain has returned. Ken tried a new experiment planting barley into a switch grass field. He removed the switch grass and no-tilled winter barley directly into the field. He is hoping that the barley will come off in time for the switch grass to grow again next year. Stay tuned to find out how that goes.

Pumpkin Honey
10 cups cooked strained mashed pumpkin
8 cups white sugar
1/2 pound butter
grated rind and juice of 4 lemons
Simmer all together 20 minutes or until thick – do not boil
Pour into hot sterile jam jars and seal . (I cover the jars with an inch of boiling water in a large pot and bring to a boil for 10 – 15 minutes. Remove from water and make sure the lids are tight.)
The old fashioned way is to boil the pumpkin in lightly salted water, drain and mash. You can microwave it and put it in the food processor if you wish. ( I just poke the pumpkin to break the skin and bake it whole in the oven until it is soft. I then let it cool, cut it open, remove the seeds, scoop out the pumpkin flesh and puree it in the food processor. Long Pie pumpkins work well for this recipe.)
Great on toast, biscuits and in tarts.
Kohlrabi and Parsnips
The end of our CSA season is fast approaching. Our last CSA pick-ups are Tuesday, October 6 and Saturday, October 10. Our applications for the 2016 season are available now. Orchard Hill Farm application 2016

dip in Hummus;
grate into coleslaw (add some red meat winter radish);
shave into salad;
throw into soup;
roast with other root vegetables.
Kohlrabi Fritters from the kitchen of Ellen Laing
1/2 lb. kohlrabi, grated
1 carrot or sweet potato, grated
1 egg
1 T. cornstarch
1/4 t. salt
1/4 t. cayenne
1/2 cup grape seed oil or canola oil
Squeeze the liquid from the kohlrabi and carrot/sweet potato with your hands or put in a tea towel and squeeze. Mix in a bowl with eggs, cornstarch, salt and Cayenne. Heat oil in a large skillet and drop large spoonfuls of Fritters into oil, fry until golden brown on each side.
We are about to start digging parsnips. For those of you who don’t know what to do with parsnips, I have reposted my parsnip cake recipe.
Parsnip Cake Recipe for 8 x 8 inch pan from the kitchen of Martha Laing
1 cup granulated sugar
1 cup flour
1/2 teaspoon fine sea salt
1 1/2 teaspoon baking powder
1 tsp cinnamon
1 tsp ginger
3/4 cup sunflower oil
2 eggs
1 1/2 cups grated parsnips
1/4 cup chopped pecans or walnuts
1/4 cup crystallized ginger
Preheat oven to 350 degrees F.
Combine sugar, flour, salt, baking powder, cinnamon, ginger; beat in oil until mixture is light in colour, about 3 minutes.
Beat in eggs, one at a time, beating for about 30 seconds after each addition. Add parsnips, mixing thoroughly.
Spread in well-greased and floured 8 x 8 inch baking dish. Bake for 50 – 55 minutes or until tester inserted in centre comes out clean. Let cool in pan before spreading with Cream Cheese Frosting.
* Recipe can be doubled for a 9 x 13 inch pan recipe. It can also be doubled and divided between 3 – 9 inch round cake pans for a layered cake. For a fancy cake, I put caramelized apples between the layers and add crystallized ginger pieces to the cream cheese icing.
Cream Cheese Icing for 8 x8 inch pan
8 oz cream cheese, softened
1/2 cup butter, softened
1 cup icing sugar, sifted
Milk
In mixing bowl, beat together cream cheese and butter, add enough milk to make fluffy spreadable consistency. Double recipe for layer cake.
Caramelized Apples for filling between layers of fancy cake
6 tablespoons butter
1/3 cup sugar
2 pounds Golden Delicious or Honey Crisp apples(or other firm apple variety), peeled cored, cut into 1/2 inch slices.
2/3 cup whipping cream
Melt butter in large skillet over medium heat; cover with sugar. Stir until sugar begins to melt, about 1 minute. Add apples. Cook until apples are brown and tender and juices form, about 10 – 15 minutes. Add cream and simmer until sauce thickens, about 5 minutes. Cool before assembling cake.